Showing posts with label flour. Show all posts

04 March 2014

Food Lab 27: Roux

Happy Fat Tuesday, y'all!

Your Food Labbers gathered on Sunday for our latest lab adventure. Mad Kitchen Scientist, the Executive Committee, Chef Spouse and I were joined by two new Labbers: Eggman and Die Künstlerwranglerin. With Mardi Gras right around the corner, we decided it was time to tackle something that's been on the "to lab" list for some time: roux.

Roux is a foundational technique of both French cooking and Cajun cooking. As the saying goes:


Roux is merely flour cooked in an equal amount of fat. It provides thickening to a variety of dishes ranging from the classic (espagnole sauce, béchamel sauce, and more on that later) to the down-home (gumbo).

Sounds simple.

Ah! But what flour? What fat? How dark? Fast or slow? And, perhaps the most important question one has to answer in order to make a real Cajun (dark) roux: what's the difference between burning and burnt?

We set out to answer all of those things.

We had a variety of fats to work with: butter, clarified butter, various vegetable oils, duck fat, bacon fat, lamb fat. We also had our standby King Arthur unbleached white all purpose flour, plus corn meal and pumpkin flour. And we wanted to work with fast and slow stovetop roux, as well as Alton Brown's oven roux technique.

Obviously, we were not going to make 12 varieties of gumbo, not least of which because you really need to wait until the next day to eat your gumbo, and that was not going to happen.

First Chef Spouse made us a round of his fantastic Ramos gin fizzes, to facilitate planning our order of operations. We decided that our first test would to make three roux on the stovetop, regular flour and butter, going light, caramel, and dark, and then turning those into béchamel to top roasted beets, roasted Belgian endives wrapped in proscuitto, and pearl onions sauteed in butter.


Eggman and The Executive Committee got to work processing the beets, endives, and onions. Mad Kitchen Scientist had also brought along three whole ducks (which is the quantity of ducks one buys when buying duck), so he and Die Künstlerwranglerin got to work disassembling them so we could confit the legs and make duck liver pate.

In the meantime, I was mid-way through making a King Cake. Die Künstlerwranglerin wanted to see how it's done, and I had started it earlier in the morning so it would be done in time for us to enjoy some later in the afternoon.

In that first round, we learned that it's pretty hard to make a dark roux with unclarified butter on the stovetop, as the milk solids tend to burn and get very bitter. Needless to say, the béchamel we tried to make with it did NOT taste good. Fortunately, I'd had the foresight to start a butter-based oven roux while everyone was busy chopping and whisking:


Also fortunately, we were left with completely serviceable caramel and light roux based béchamel for our onions, endives, and beets. Traditionally, béchamel is made with a very light roux, since it's a white sauce. Thing is, I've always thought that leaves it tasting of raw flour. Not appealing. If you're not concerned about maintaining that pure white color, our advice is to go for a caramel roux, with an egg yolk added at the end. That is some tasty, tasty béchamel, as we can attest, since we took a break to eat the béchamel-topped beets, onions, and proscuitto-wrapped endives.

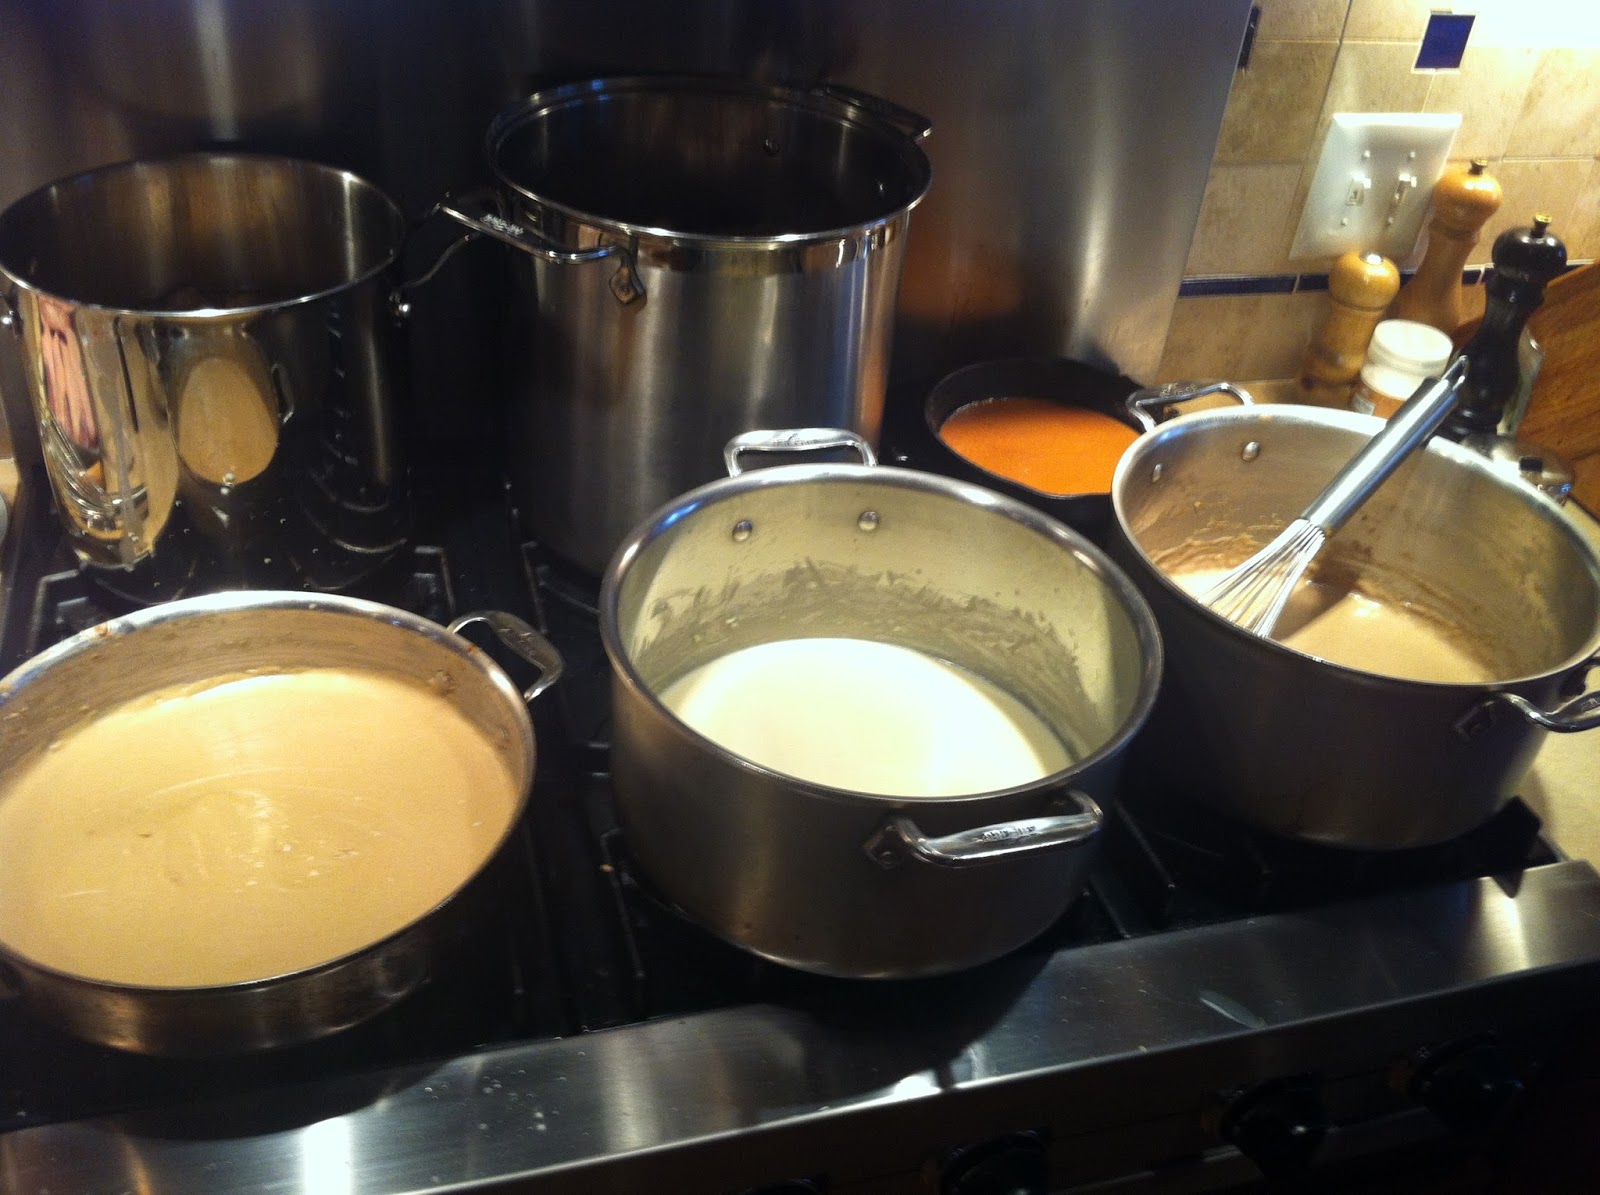
Our next test was to look at other fats and other flours. We decided to make four dark roux: corn meal in bacon fat, pumpkin flour in duck fat, regular flour in duck fat, and regular flour in bacon fat. Whichever one(s) turned out would become étouffée later in the day.

Corn meal does not make a good roux. We're not sure if it's the lack of gluten, or the fact that it's coarser than flour, or what, but it ended up looking like the sand at the edge of the water at the beach, right at the tideline.

The pumpkin flour, on the other hand, was a very pleasant surprise. It made a really nice roux. So maybe it has nothing to do with the gluten content. Hmmm. We ended up combining it with the butter-based oven roux and using it as the base for duck confit and andouille étouffée that was the BOMB DIGGITY.

We also discovered that either duck or bacon fat make for a much better dark roux base, even if you're going slow on the stovetop, but particularly if you're using the fast roux technique.

What is the fast roux technique? Highest heat possible, and keep that flour moving at ALL times! If you're going to attempt the fast version of dark roux, you must roll your sleeves down and wear something like this on your hands. Cajun napalm is no joke if you get it on your skin, and the fast roux technique increases the chances that's going to happen dramatically.

The regular flour roux got combined for shrimp and andouille étouffée that was also quite good, but not as good as the duck confit version (quelle suprise!).

Chef Spouse usually makes étouffée with a relatively light roux, and I think the dark roux was a revelation. It doesn't offer as much thickening, of course, but I think it brings a lot more flavor to the party.


So what did we drink? In addition to the Ramos gin fizzes, we made sazeracs with various bitters, including The Eggman's gift for the house of Bitter Truth Creole bitters, which, as far as we can tell, were specifically made for sazeracs. Yep, *that* good. He had also brought some lavender honey simple syrup that we played with, too, as well as a small sample pack of unusual bitters, including chocolate and cardamon, which made their way into manhattans. Since we had a variety of absinthes, including a violently green Eastern European version The Eggman brought along with some Fee Brothers rock candy simple syrup, we also had to make an absinthe frappe.


The point of the absinthe frappe, a drink I happen to adore, is to get all the benefits of an absinthe fountain without actually having an absinthe fountain (or, if you have one, going through the trouble of setting it up and waiting). It's a shortcut to getting the absinthe diluted, sweetened, and cold. I endorse this technique.

Oh - and, of course, King Cake, beautifully decorated by The Executive Committee and Die Künstlerwranglerin.


Yeah, you right!

14 November 2012

Food Lab 18: Pasta

Planning for pasta Food Lab began two weeks ago when we feared that the election would never ever never end. A comfort food to calm us should swing states get into a litigious brawl and ballot recounts become inevitable. Instead, we rolled out our linguine and ravioli in super PAC-free peace. Is this a great country or what?


We compared linguine made with flour to one with flour and semolina. We then added spinach to the dough, again making a linguine with flour only and one with flour and semolina. The show stopper was the comparison of spinach/flour ravioli stuffed with squash puree to spinach/flour/semolina ravioli stuffed with squash puree. Chef Spouse took the lead. Mad Kitchen Scientist kept ingredients moving and pots of water boiling (MKS notes: kitchen clogs on feet would be ideal for performing latter task, birks and socks not so much). Elizabeth harvested spinach, parsley, and sage from garden to kitchen. The Empress deftly made bowtie pasta with her tiny little fingers using plain linguine dough. Indoctrination has begun. The rest of us pretty much ate and drank.

Linguine – Plain 

¾ cup King Arthur All Purpose flour
1 egg beaten
Pinch of salt dissolved in beaten egg
1 Tbsp olive oil

Blend all ingredients together with a fork until consistency looks like couscous. This ratio was too wet, so we added 1 tbsp of flour. Use hands to meld dough.

Rolling technique [used on all pasta variations we made]: First, use wooden roller to press dough into an oblong disk shape of about a ¼ inch thick. Next, run disk of dough through Kitchen Aid pasta roller twice on level 1. Take dough and trifold it, then turn 90 degrees. Flatten with wooden roller to about ¼ inch thick. Roll dough through Kitchen Aid roller on level 1. Repeat this last step until edges smooth. To make linguine, run dough through one time on each level of Kitchen Aid pasta roller all the way up to level 6. You will have a pretty piece of dough. Cut this into 10 inch segments. Change pasta roller attachment to linguine cutter attachment. Pass each dough segment through cutter to make pasta noodles.

Resting technique: We initially rested the noodles clumped on plate that had been sprinkled with semolina, but realized that layering noodles on plate with semolina between layers is preferable. Another option is to hang noodles to dry on kitchen cabinet doors or other ingenious spot. We were putting ours into boiling water pretty quickly, so we weren’t too concerned about drying time.

Boiled linguine for 3 minutes, drained, and tossed with warm blended concoction of 4 tbsp butter, 2 minced garlic cloves, and 1 tbsp chopped fresh parsley. Salt to taste.

Texture and taste: Before and after boiling, noodles were smooth. When compared with the linguine that had semolina (see next recipe), this pasta was more al dente. Definitely calling for red tomato sauces, with our without meat.

Linguine - Semolina


½ cup King Arthur All Purpose flour
¼ cup Semolina flour
1 egg beaten
Pinch of salt dissolved in beaten egg
1 Tbsp olive oil

Blend all ingredients together with a fork until consistency looks like couscous. This ratio was also too wet, so we added 1 tbsp of flour. Use hands to meld dough.

Rolling Technique: Follow technique as directed above.

Resting Technique: Sprinkle plate with semolina, layer noodles on plate with semolina sprinkled between layers.

Boiled linguine for 3 minutes, drained, and tossed with warm blended concoction of 4 tbsp butter, 2 minced garlic cloves, and 1 tbsp chopped fresh parsley. Salt to taste.

Texture and taste: Before boiling, pasta was grainer and a little drier than flour only linguine. After boiling, the noodles were softer than the flour only linguine, but still had a little graininess. Perhaps best with light creamy sauces or al fresco veggie interpretation.

Spinach Linguine 

1+ cup King Arthur All Purpose flour
1 egg beaten
3/8 tsp salt dissolved in beaten egg
4.5 oz of fresh spinach wilted in pan, water squeezed out, pulse down in food processor and add 1 egg

There is no oil in this version.

Blend all ingredients together with a fork until consistency looks like couscous. Use hands to meld dough.

Rolling Technique: Follow technique as directed above. Need to dust flour on dough between feeds through Kitchen Aid pasta roller due to wetness. After we cut into segments, but BEFORE cutting into linguine, dry dough segments by stacking them on a cooling rack, with semolina between each layer.

Boiled linguine for 3 minutes, drained, and tossed with warm meaty tomato sauce. Salt to taste.

Spinach Linguine – with Semolina 

1 cup King Arthur All Purpose flour
1/3 cup Semolina flour
1 egg beaten
3/8 tsp salt dissolved in beaten egg
4.5 oz of fresh spinach wilted in pan, water squeezed out, pulse down in food processor and add 1 egg

Again, no oil in this version.

Blend all ingredients together with a fork until consistency looks like couscous. Use hands to meld dough.

Rolling Technique: Follow technique as directed above. Need to dust flour on dough between feeds through Kitchen Aid pasta roller due to wetness. After we cut into segments, but BEFORE cutting into linguine, dry dough segments by stacking them on a cooling rack, with semolina between each layer.

Boiled linguine for 3 minutes, drained, and tossed with warm meaty tomato sauce. Salt to taste.

Spinach Ravioli (with and without semolina), filled with Squash puree 

For the ravioli dough, we made the recipes above for the spinach linguine with and without semolina. Instead of making final cut into linguine, however, Chef Spouse cut dough lengthwise in 55/45 ratio so that one length is slightly wider than the other. He then spooned teaspoons of puree onto narrower strip about every 3 inches, leaving at least an inch at top and bottom of strip. The wider strip was placed over the pureed strip and he used a ravioli roller to crimp edges all around and evenly between dollops. He cut the ravioli into equal squares.

Boiled for 3 minutes, then tossed with brown butter and sage sauce (20 sage leaves chopped, 1 stick of butter sautéed until lightly browned).

Nirvana.

Written by The Executive Committee

22 January 2012

Food Lab 14: Flour Tortillas

Flour tortillas, I believe, are an excellent demonstration of the concept that "simple" does not equal "easy."

The "simple" part: the ingredients. Flour, water, a little salt, a fat (we tried both lard and canola oil) and possibly a little baking powder. And, in fact, making the dough is simple - combine/cut the fat into the flour (and baking powder, if you're using it), add salted water a little at a time until you have a dough that you can form into a cohesive ball but is still fairly dry, rest it, form it, cook it.


Ah yes: form and cook. The "not easy" part. Actually, even the dough falls in the "not easy" category, because ratios and resting times and environments vary.

Recipes: we tried two approaches. Mad Kitchen Scientist and I worked variations on Diana Kennedy's very traditional approach. She recommends bread flour and vegetable shortening. We used The Only Flour You'll Ever Need (accept no substitutes) and lard. Hey, if you're going to go traditional, go traditional. Diana's recipe is a pound of flour, cut in 4 oz. of fat, then moisten with 1 tsp. of salt dissolved in 1 cup of warm water. Even on a dry, cold day, we didn't need a full cup of water - we needed a little more than 3/4 c. water to make a nice dough. And, in the first batch, we found that 4 oz. of lard was a bit too much - the tortillas turned out a little too flaky. They tasted great, but they reminded everyone of pie crust. In a second round, we went with 3 oz. of lard to greater success.

For the forming, we rolled the dough into 10 roughly equal sized balls and let them rest. Diana says rest the dough for anywhere from 20 minutes to 2 hours, but I'd recommend letting them rest at least an hour - we started forming tortillas at 20 minutes, and the dough was far more cooperative at the end. Diana recommends patting and stretching them into shape by hand. We also had two tortilla presses, which are vital to forming corn tortillas, and rolling pins. The tortilla presses couldn't get them thin enough. The "by hand" method might work if you've been forming tortillas since childhood, but it didn't work for us. The method that worked the best was rolling the tortillas out on a Silpat to about an 8 inch diameter.


Then on to the cooking: dry cast iron, either a griddle or a large skillet, over medium heat. The Executive Committee was manning the stove, and what she discovered is that the tortillas needed to cook 1-2 minutes per side depending on how thick they were, but that the key, contrary to the advice, is to flip several times, so you can keep an eye on browning progress.

Meanwhile, Chef Spouse took the Cooking for Geeks approach: find all the recipes you can, create a grid of ingredients and quantities, and use that to figure out what your ratios should be. His recipe included 2 cups of flour, 1 1/2 tsp. baking powder, 1 tsp. salt, 2 Tbsp. canola oil, and 3/4 c. water. Combine all, adding the water slowly, and mixing until you get to the point you need to start kneading. Still form the dough into about 10 equally sized balls and rest about 30 minutes, then roll out, being careful to avoid rolling over the edges (you don't want them to get thinner than the rest of the tortilla, or they'll be brittle), although his dough kept springing back on him, which made getting to an 8 inch diameter a little tough. Cook the same way as above. They were...biscuity. In the second batch, he took the baking powder down to 1 tsp. and rested the dough in the refrigerator before rolling out. Both were improvements - the dough was more cooperative with being rolled out and the flavor was better - but I still liked the lard-based dough better. Mad Kitchen Scientist agreed with me, but I think everyone else - Chef Spouse, the IAs, The Executive Committee - preferred the non-lard tortillas.


Unlike with corn tortillas, you don't want to store flour tortillas under a tea towel. While the steam created by the heat keeps the corn tortillas pliable, steam with flour-based dough just makes it get pasty spots. Yuck.

Papa IA, whose job, we've all decided, is to encourage us to push the envelope, came up with a plan for cocoa tortillas. We based it on Diana Kennedy's recipe, half batch: 7 oz. flour, 1 oz. unsweetened cocoa powder, a solid shake of cayenne, a solid shake of cinnamon, 2 oz. lard, and a little less than 1/2 c. of water with 1/2 tsp. salt dissolved in it. Combine the flour, cocoa, cayenne and cinnamon, cut in the lard, add the salt water slowly to form dough, shape into more like 6 balls, rest, roll out, cook. They were really good, and would be excellent as a wrapping for mole. Papa IA also discovered that sprinkling on a little powdered sugar and then dipping in a Mexican anise liquor he'd brought was delish as well.


On the tortillas, we ate Mad Kitchen Scientist's pork chili verde and Chef Spouse's flank steak fajitas. To drink? The Executive Committee brought the makings of sangria, and Chef Spouse and I had found the first blood oranges of the season, which we juiced for blood orange margaritas.


What did we learn? Simple but not easy, flour tortillas can be learned in an afternoon, but they'll take some time to master. With our Super Bowl party coming up in two weeks, we'll be eating a lot of Mexican food so Chef Spouse can keep practicing. Also, Chef Spouse needs a cast iron griddle.