10 December 2012

Food Lab 19: Butchering, Part 1

This lab was a little unconventional. Until we rendered the fat at the end, there was no cooking.

There was a lot of knife work, though.

Let me take you back a few weeks. When we were doing Food Lab: Pasta, the Mad Kitchen Scientist informed us that he had a hookup to get a freshly slaughtered lamb or two. All of us perked up, particularly when he informed us that we could likely do the butchering.

Sure enough, he was able to secure two lambs (affectionately nicknamed Bo and Peep), which were slaughtered a week ago, skinned and gutted, and allowed to hang. Mad Kitchen Scientist picked them up Saturday, and brought them to our place for cutting up Sunday (we have the most counter space).


The IAs were unable to join us, and The Executive Committee, less interested in the process of cutting up an animal and perhaps a little squicked out, decided that watching football while knitting was the better part of valor.

So we aproned up, collected extra paper towels and bandages, sharpened the knives, cracked open Whole Beast Butchery, and got to work.

What did we learn?

There's a reason butchers have band saws. We had a hack saw, and with some elbow grease it did work to do things like sever the neck from the spine, crack the breastbone, split the spine and pelvis, and separate the joints. And when the hack saw didn't cut it (no pun intended), we had a cleaver and a mallet at hand.

Before you ask: yes, we all cut ourselves, but none of us seriously.

The main disassembly actually happened pretty quickly. The steps were:
  • Separate the neck from the rest of the body (and save it for stock or merguez)
  • Separate the upper rib cage between the 5th and 6th ribs
  • Separate the lower rib cage between the 12th and 13th ribs
  • Separate the "saddle" (which includes the pelvis)
  • Remove the back legs at the hip joints 
All together, for both lambs, that probably took us 90 minutes.


Then we got into the fine work. Which took about five hours.

The upper rib cage turns into two shoulder roasts and two shoulder racks, plus the forelegs come off for the stockpot.

The lower rib cage is where you get your rack of lamb, Frenched or not (your choice), or lambchetta (which is like porchetta but, of course, with lamb).


The saddle becomes tenderloin, boneless loin chops, or lamb "porterhouses" (bone in loin chops).

The legs get boned out into roughly five sections per leg, with each leg producing 4-5 pounds of meat.

Plus each lamb gave us about four pounds of sausage meat.

Of course, we also got the heart, kidneys (still attached to the main carcass upon arrival), and the liver for both lambs.


And we rendered out about 10 cups of lamb fat.

Does that sound like a lot of work? It was.

What did we learn?

I don't think we appreciate butchers enough. This is hard work.

If you're going to do this, you MUST have a reliable method of sharpening your knives at home. We had to stop to resharpen multiple times. You also need multiple hack saw blades.

We probably didn't need the practice lamb, which was ostensibly why we got two. Yes, the second time around did go a little more smoothly, but as long as you pay attention to the lamb's anatomy, you won't go far wrong in your cuts even on the first lamb. But having two made it much easier to divide things up among three couples.

It did kind of make a mess. Not blood - the lamb had hung for a week, so there was very little blood left. But things did get pretty greasy. It took me and Chef Spouse about two hours to clean up after we were done.

If you're going to try this at home, you need at least two people for purposes of hefting, holding, and cutting the carcass. You need plenty of counter space. You need ample time. You need a hack saw, a cleaver, a mallet, and SHARP boning knives. You need a large freezer to store the results of your labors.And you probably want to plan to get take out, because you aren't going to feel like cooking after.

Next up: Butchering, Part 2, where we make stock with all the bones and sausage with the leftover bits and ends, and the rendered fat.

14 November 2012

Food Lab 18: Pasta

Planning for pasta Food Lab began two weeks ago when we feared that the election would never ever never end. A comfort food to calm us should swing states get into a litigious brawl and ballot recounts become inevitable. Instead, we rolled out our linguine and ravioli in super PAC-free peace. Is this a great country or what?


We compared linguine made with flour to one with flour and semolina. We then added spinach to the dough, again making a linguine with flour only and one with flour and semolina. The show stopper was the comparison of spinach/flour ravioli stuffed with squash puree to spinach/flour/semolina ravioli stuffed with squash puree. Chef Spouse took the lead. Mad Kitchen Scientist kept ingredients moving and pots of water boiling (MKS notes: kitchen clogs on feet would be ideal for performing latter task, birks and socks not so much). Elizabeth harvested spinach, parsley, and sage from garden to kitchen. The Empress deftly made bowtie pasta with her tiny little fingers using plain linguine dough. Indoctrination has begun. The rest of us pretty much ate and drank.

Linguine – Plain 

¾ cup King Arthur All Purpose flour
1 egg beaten
Pinch of salt dissolved in beaten egg
1 Tbsp olive oil

Blend all ingredients together with a fork until consistency looks like couscous. This ratio was too wet, so we added 1 tbsp of flour. Use hands to meld dough.

Rolling technique [used on all pasta variations we made]: First, use wooden roller to press dough into an oblong disk shape of about a ¼ inch thick. Next, run disk of dough through Kitchen Aid pasta roller twice on level 1. Take dough and trifold it, then turn 90 degrees. Flatten with wooden roller to about ¼ inch thick. Roll dough through Kitchen Aid roller on level 1. Repeat this last step until edges smooth. To make linguine, run dough through one time on each level of Kitchen Aid pasta roller all the way up to level 6. You will have a pretty piece of dough. Cut this into 10 inch segments. Change pasta roller attachment to linguine cutter attachment. Pass each dough segment through cutter to make pasta noodles.

Resting technique: We initially rested the noodles clumped on plate that had been sprinkled with semolina, but realized that layering noodles on plate with semolina between layers is preferable. Another option is to hang noodles to dry on kitchen cabinet doors or other ingenious spot. We were putting ours into boiling water pretty quickly, so we weren’t too concerned about drying time.

Boiled linguine for 3 minutes, drained, and tossed with warm blended concoction of 4 tbsp butter, 2 minced garlic cloves, and 1 tbsp chopped fresh parsley. Salt to taste.

Texture and taste: Before and after boiling, noodles were smooth. When compared with the linguine that had semolina (see next recipe), this pasta was more al dente. Definitely calling for red tomato sauces, with our without meat.

Linguine - Semolina


½ cup King Arthur All Purpose flour
¼ cup Semolina flour
1 egg beaten
Pinch of salt dissolved in beaten egg
1 Tbsp olive oil

Blend all ingredients together with a fork until consistency looks like couscous. This ratio was also too wet, so we added 1 tbsp of flour. Use hands to meld dough.

Rolling Technique: Follow technique as directed above.

Resting Technique: Sprinkle plate with semolina, layer noodles on plate with semolina sprinkled between layers.

Boiled linguine for 3 minutes, drained, and tossed with warm blended concoction of 4 tbsp butter, 2 minced garlic cloves, and 1 tbsp chopped fresh parsley. Salt to taste.

Texture and taste: Before boiling, pasta was grainer and a little drier than flour only linguine. After boiling, the noodles were softer than the flour only linguine, but still had a little graininess. Perhaps best with light creamy sauces or al fresco veggie interpretation.

Spinach Linguine 

1+ cup King Arthur All Purpose flour
1 egg beaten
3/8 tsp salt dissolved in beaten egg
4.5 oz of fresh spinach wilted in pan, water squeezed out, pulse down in food processor and add 1 egg

There is no oil in this version.

Blend all ingredients together with a fork until consistency looks like couscous. Use hands to meld dough.

Rolling Technique: Follow technique as directed above. Need to dust flour on dough between feeds through Kitchen Aid pasta roller due to wetness. After we cut into segments, but BEFORE cutting into linguine, dry dough segments by stacking them on a cooling rack, with semolina between each layer.

Boiled linguine for 3 minutes, drained, and tossed with warm meaty tomato sauce. Salt to taste.

Spinach Linguine – with Semolina 

1 cup King Arthur All Purpose flour
1/3 cup Semolina flour
1 egg beaten
3/8 tsp salt dissolved in beaten egg
4.5 oz of fresh spinach wilted in pan, water squeezed out, pulse down in food processor and add 1 egg

Again, no oil in this version.

Blend all ingredients together with a fork until consistency looks like couscous. Use hands to meld dough.

Rolling Technique: Follow technique as directed above. Need to dust flour on dough between feeds through Kitchen Aid pasta roller due to wetness. After we cut into segments, but BEFORE cutting into linguine, dry dough segments by stacking them on a cooling rack, with semolina between each layer.

Boiled linguine for 3 minutes, drained, and tossed with warm meaty tomato sauce. Salt to taste.

Spinach Ravioli (with and without semolina), filled with Squash puree 

For the ravioli dough, we made the recipes above for the spinach linguine with and without semolina. Instead of making final cut into linguine, however, Chef Spouse cut dough lengthwise in 55/45 ratio so that one length is slightly wider than the other. He then spooned teaspoons of puree onto narrower strip about every 3 inches, leaving at least an inch at top and bottom of strip. The wider strip was placed over the pureed strip and he used a ravioli roller to crimp edges all around and evenly between dollops. He cut the ravioli into equal squares.

Boiled for 3 minutes, then tossed with brown butter and sage sauce (20 sage leaves chopped, 1 stick of butter sautéed until lightly browned).

Nirvana.

Written by The Executive Committee

23 September 2012

Food Lab 17: Lobster

At our last Food Lab, when we were thinking about the topic for our next lab, Mad Kitchen Scientist observed that lobster's cheap right now - well, not cheap, but cheaper than normal.


Decision made.

When we were at the Maine Avenue Fish Market, purchasing 4 monsters weighing it at over 4 pounds each, plus 4 smaller crustaceans (totaling over 25 pounds of lobster), we came up with the appropriate term for the amount of (over) purchasing we invariably do when we all shop together: "n absurdity." Yesterday, we purchased an absurdity of lobster. Needless to say, at $11 a pound, this was probably the most we've ever spent on the raw ingredients.

We started out the day planning to make lobster thermidor, using Julia's classic recipe, lobster bisque, and looking to compare a straight steam with a partial steam and then finishing on the grill.

Here's what we learned:

Much like with pizza, grilling was gilding the lily. Also it made the tails a little tough. Tasty, but tough.

None of us had any problems dumping the live lobsters into the pot. Apparently, we're a bunch of heartless bastards.

Complicated recipes may be a bad idea at food lab. We missed several key steps in the thermidor recipe. It was still totally edible, but not nearly as transcendent as I was expecting. And the lobster bisque, well, it needs work. We have a decent amount left over, so we can mess around with it more, but it's way too thick and not as flavorful as I'd hoped: rich, but bland.

Chef Spouse has been doing an official cooking class for about two months now. He recently learned a secret ingredient for savory dishes: 100% cacao chocolate. It really does make EVERYTHING taste better.

Bigger lobsters look really impressive, but they don't taste any better, and they're hard to deal with - you need a BIG pot, and an actual hammer to get the meat out of the shells. 

Bash open your cooked lobsters OUTSIDE. Chef Spouse had to clean the kitchen ceiling today. Not joking.

(Those last two may be related.)

Even though the recipes mostly didn't turn out as expected, though, it's impossible to really mess up lobster.


27 August 2012

Food Lab 16: Pizza Dough

It's a miracle! Not only do I now feel confident making 'za from scratch, but our postponed-since-May lab finally took place.

It was, of course, never the toppings that were the problem. If you can figure out what to order on your pie in your local gourmet pizza joint, you can figure out toppings.

It was the dough. THE DOUGH!


Hard to believe in someone who bakes as much as I do, I know.

I was raised on homemade pies, but my mom made a "Maryland-style" crust - yeast dough, but thick and somewhat biscuit-y. Not my preferred style, particularly not once I was introduced to the thinner Neapolitan style pies.

Off and on for years, I've tried to make a good dough. I mostly found that my doughs were too springy, so by the time I had coaxed them into being the right size, I'd worked them to the point they got tough.

Did I mention that my favorite type of breads to bake are rustic loaves that don't require a pan?

Spot the problem?

Gluten formation. Particularly after my 2010 resolution to learn to make real French baguettes, I've become accustomed to dough that's worked hard and actively fights back, occasionally with rudimentary weapons formed from ordinary kitchen objects.

But Mad Kitchen Scientist schooled me right. For pizza, particularly thin crust pizza, you need a very soft dough. His recipe?

Generous tsp. of yeast, proofed in 3/4 c. warm water with a little honey

3/4 c. each of all purpose flour, semolina flour, and whole wheat pastry flour

1 tsp. salt

1 Tbsp. olive oil

Dump the semolina and whole wheat pastry flour into your mixing bowl. Add the salt. Drizzle in the olive oil. Once the yeast proofs, dump it into the flour mixture. Stir at first (the dough will be pretty wet), adding in the all purpose flour a little at a time. Once the dough starts coming together, knead just until it forms a ball, adding more flour if you need (and you might not need the full 3/4 c. of the all purpose), then pop it into an oiled bowl, cover, and let rise at least an hour.

In the meantime, slide your pizza stone or baking tiles into the oven and crank it up to 500. And prep your toppings.

What toppings?

We played with various combinations of:

thin sliced tomatoes
chiffonade basil
fresh oregano
fresh garlic
olives
olive oil
fresh mozzarella
feta
goat cheese
grated Parm-Reg
grilled eggplant
sauted eggplant
lightly sauted zucchini (still crunchy)
roasted red peppers
sauted fennel
sweated fennel tops
sausage
fresh figs
Prosciutto
honey

We were basically playing rounds of, "What did you get too much of this week from the CSA?"

My two favorite combos were zucchini, tomato, fresh garlic, mozzarella, and basil and fresh figs, Prosciutto, goat cheese and honey (our dessert pizza).

When you're rolling the dough out, treat it like pie crust - a little extra flour to keep it from sticking, roll it thin, don't work it too much.

You will need a peel to get it into the oven. Dust your peel with corn meal, gently transfer your dough onto it, construct your toppings, and slide your pizza off your peel and onto your hot stone "with conviction." That's how Mad Kitchen Scientist described it, and it's exactly right. Don't think you'll do it right - know you will.

10 minutes later, slide the peel back under your pie to get it out, cut, and eat.

A few notes on toppings:
  • Cheese = glue. Make sure you're using enough to keep the rest of the toppings on and together.
  • A little olive oil on the crust as a base layer is good. Too much and no matter how much cheese you use, your toppings will slide off.
  • You know how the chains will give you "unlimited" toppings? That's to cover up the fact that their crust tastes like chemicals and their sauce is mostly sugar. Go for quality and flavor blend, not quantity.
  • Get closer to the edge that you think. Thin crust goes best with thin edge.
We also played around with a sourdough crust, which Chef Spouse thought seemed a little gritty, a gluten-free crust for the IAs, which (no offense, Mama IA) I would not voluntarily eat again (but Papa IA has an allergy, so a cook's gotta do what a cook's gotta do), and grilling pizza, which the Mad Kitchen Scientist declared to be unnecessarily gilding the lily.

Of course, this all comes down weeks after this joint opened in my neighborhood, after 12 years of living in a pizza desert, so I'm not sure how much practice I'll be getting perfecting my pies.

16 June 2012

Food Lab: Field Trip

The weekend of May 19-20, your intrepid Food Labbers PLANNED to lab homemade pizza dough. We were going to lab gluten free, we were going to lab baking versus grilling, we were set...until  Frederick Beer Week, and more specifically, Firkin Fest came along. How could we resist?


So we car pooled up to Stillpoint Farm for a day of food, music, and beer tasting (and hops-admiring) in the bright sunshine.

We quickly realized three things:
  1. Mad Kitchen Scientist's home brews were better than any of the home brews being presented for "tastes" (that were much more akin to full pours).
  2. Of the local micro-brewers who were there, Barley & Hops brews were the favorites.
  3. We were going to need dinner when we got home.
Chef Spouse hadn't been able to join us because he had to work. We got talking about crab cakes and realized we wanted to impromptu lab them, so we called Chef Spouse and asked him to make a pit stop at the fish market on his way home.

The main goal any crab cake is to have it be as nearly 100% crab as possible without falling apart. Common binders include bread crumbs, mayonnaise, egg, or some combination of the above.

Mad Kitchen Scientist had learned a new binder technique: shrimp paste. No, not the prepared Asian ingredient you can buy - actually turning some shrimp into a paste. We labbed them against Chef Spouse's current favorite preparation, as detailed in Donald Link's Real Cajun cookbook.

Of course, we also made fries and aioli. Of course, Chef Spouse's aioli broke enough times that we had to send The Executive Committee to the corner store for more eggs. Of course, we stuck to our "no egg white left behind!" motto. Of course, there were a LOT of egg whites to be turned into various sorts of fizzes.

There wasn't a clear winner in the crab cakes, both of them being delicious. The Donald Link cakes are spicier (big surprise). Using the shrimp as a binder left the alternative cakes tasting a bit of, well, shrimp. Mama IA suggested that a way around that would be to use a mild tasting white fish as a binder instead. Next time...

The following day, we had a colleague (that's him in the photo) and his wife over for our first ever crawfish boil.

Alton Brown did an episode of Good Eats a while back on crawfish boils, and Chef Spouse had been hanging onto it in anticipation of this day. Alton discusses the merits of pre-soaking your crawfish to clean them out. Which is a great idea. Assuming you have an aquarium pump to get air into the water. We didn't. As a result, we experienced near 100% casualties in the five pounds of crawfish we bought Saturday and soaked in the big tub overnight. Lord, did that stink!


Anyway, we boogied back to the fish market Sunday morning once our guests arrived, purchased another five pounds of crawfish, and all was well. Particularly once the cooking process was accompanied by my colleague's fantastic basil gimlets, which is just what it sounds like - a gin gimlet with basil in it. Delish!

Boils are actually not that complicated - buy or find a good spice mix (once again, Donald Link won't steer you wrong), get a big pot of water boiling, dump in your boil spices, dump in your mudbugs, cover, turn off the heat, let them sit for about 20 minutes, drain, and eat. Preferably outside off newspaper. Which is exactly what we did.

I see a crawfish rig in our future...and probably an aquarium pump.

(We are planning to revisit the aborted pizza dough lab later this month.)

02 April 2012

Food Lab 15: Moules et Frites

I know it's been two months since the last Food Lab, but in our defense, this one got rescheduled twice, and even with all that, the IAs weren't able to join us. It's been a busy spring.

Speaking of spring, I can think of few better ways to spend a lovely spring day than hitting the Maine Avenue fish market with Mad Kitchen Scientist, Chef Spouse, and the Executive Committee, buying several bags of mussels, heading home via Sapore, where we picked up truffle oil and truffle salt, and then labbing them up with frites and several takes on aioli.


Speaking of the frites, Mad Kitchen Scientist had rendered some beef tallow, which he brought to add to our typical peanut oil deep fry. Chef Spouse claimed he couldn't taste the difference, which I think is mad - there was a DELICIOUS difference. Sure, beef tallow's probably not all that healthy, but then again, fries aren't exactly arugula salad to begin with, and since when has "healthy" been a criteria for Food Lab (never, just in case you haven't been paying attention)?

But the real stars of the day, other, of course, than the truffle oil, were the mussels. I've eaten the delicious bivalves many times, but this was my first time making them. I did all the de-bearding, and that was an interesting process. Many of the mussels, which were resting in a bowl of cold water, were very slightly open. As soon as I started messing around with the beards, they all, to coin a phrase, clammed up tight. It was slightly disconcerting to be reminded that, although they weren't nearly as feisty as last weekend's blue crabs, those mussels were still very much alive.


We decided that four mussel preparations would likely get us into enough trouble. We chose:
  1. Traditional white wine, cream and herbs (in our case, shallots, garlic, parsley, tarragon and bay)
  2. Traditional tomato base (to which we added shallots and garlic, parsley, bay, oregano, capers and olive oil)
  3. Fennel (with white wine, garlic, bay, a sweet/hot red pepper, and butter to finish)
  4. Asian (with garlic, a sweet/hot red pepper, cilantro stems, ginger, scallions, and a combo of mirin, rice wine vinegar, sriracha and chicken stock for the liquid)
In the first round, it was traditional cream versus fennel. The traditional cream won, although we were all surprised at how tasty the poached fennel was.

The second round was tomato base versus Asian. We agreed that that tomato base would make an EXCELLENT pasta sauce (in fact, we couldn't finish them all, so we removed all the remaining mussels from their shells, dropped them in the tomato sauce, and guess what Chef Spouse and I will be having for dinner tonight or tomorrow?).

The shocker was the Asian mussels. It might have been the tasty, tasty rooster sauce, but we could not get enough of the broth.

Oh, and I should point out that making mussels could not be easier. Debeard them and stick them in a bowl of cold water while you prep whatever ingredients you want to use for the sauce (make sure you include enough liquid to cover however many mussels you have in the pot you'll be using). Bring your sauce ingredients to a boil, skim the mussels out of the water (so all the sand they dropped stays the bottom of the bowl), and drop them in your boiling sauce. When they open up, they're done, so take them out, boil the cooking liquid/sauce down a little more, pour it over the mussels, eat.

Now Chef Spouse is not a huge shellfish/bivalve guy, so he was mostly excited about making aioli.

The first batch did not turn out. To say the least. We had curdled salad dressing. Even starting over with a new egg yolk and using the bad batch as the oil didn't help. We had three theories as to why: eggs too cold, too high a percentage of extra virgin olive oil, and we put the citrus in too late. Mad Kitchen Scientist pointed out that, while the egg might have been cold when it first went in the container, as soon as we started working it, it was no longer cold. Chef Spouse made an all extra virgin olive oil version later to test that theory, and it came out fine (other than tasting REALLY strongly of olive oil), leaving us to conclude that you MUST put the citrus in with the egg yolk right at the beginning.

We also made 4 versions of aioli:
  1. Traditional (and whisked by hand) - egg yolk, lemon, garlic, salt, half and half mix of canola and olive oils
  2. Truffle - like the above, but substituting in 1 tsp truffle oil for an equal amount of the olive oil
  3. Saffron - this was the one with 100% extra virgin olive oil, plus a hearty pinch of saffron threads that had been reconstituted in hot water (you bung in the water and the threads)
  4. Sriracha aioli - egg yolk, lime instead of lemon, 1 clove of garlic, an equal amount of ginger, salt, all sesame oil and, at the very end, a generous shot of rooster sauce
The hand whisked version was creamier, but the others (all done with an immersion blender) were fluffier. The truffle aioli was excellent on the fries. But once again, rooster sauce won the day. Oh rooster sauce, how I love you.


Now all this aioli left us with quite a few egg whites, so of course we made some Ramos gin fizzes (and thank goodness our favorite liquor store started carrying orange flower water, because ordering it online was a pain). We decided our unofficial motto is: "No egg white left behind!" But mostly what we drank was Belgian beer. What else, right?

22 January 2012

Food Lab 14: Flour Tortillas

Flour tortillas, I believe, are an excellent demonstration of the concept that "simple" does not equal "easy."

The "simple" part: the ingredients. Flour, water, a little salt, a fat (we tried both lard and canola oil) and possibly a little baking powder. And, in fact, making the dough is simple - combine/cut the fat into the flour (and baking powder, if you're using it), add salted water a little at a time until you have a dough that you can form into a cohesive ball but is still fairly dry, rest it, form it, cook it.


Ah yes: form and cook. The "not easy" part. Actually, even the dough falls in the "not easy" category, because ratios and resting times and environments vary.

Recipes: we tried two approaches. Mad Kitchen Scientist and I worked variations on Diana Kennedy's very traditional approach. She recommends bread flour and vegetable shortening. We used The Only Flour You'll Ever Need (accept no substitutes) and lard. Hey, if you're going to go traditional, go traditional. Diana's recipe is a pound of flour, cut in 4 oz. of fat, then moisten with 1 tsp. of salt dissolved in 1 cup of warm water. Even on a dry, cold day, we didn't need a full cup of water - we needed a little more than 3/4 c. water to make a nice dough. And, in the first batch, we found that 4 oz. of lard was a bit too much - the tortillas turned out a little too flaky. They tasted great, but they reminded everyone of pie crust. In a second round, we went with 3 oz. of lard to greater success.

For the forming, we rolled the dough into 10 roughly equal sized balls and let them rest. Diana says rest the dough for anywhere from 20 minutes to 2 hours, but I'd recommend letting them rest at least an hour - we started forming tortillas at 20 minutes, and the dough was far more cooperative at the end. Diana recommends patting and stretching them into shape by hand. We also had two tortilla presses, which are vital to forming corn tortillas, and rolling pins. The tortilla presses couldn't get them thin enough. The "by hand" method might work if you've been forming tortillas since childhood, but it didn't work for us. The method that worked the best was rolling the tortillas out on a Silpat to about an 8 inch diameter.


Then on to the cooking: dry cast iron, either a griddle or a large skillet, over medium heat. The Executive Committee was manning the stove, and what she discovered is that the tortillas needed to cook 1-2 minutes per side depending on how thick they were, but that the key, contrary to the advice, is to flip several times, so you can keep an eye on browning progress.

Meanwhile, Chef Spouse took the Cooking for Geeks approach: find all the recipes you can, create a grid of ingredients and quantities, and use that to figure out what your ratios should be. His recipe included 2 cups of flour, 1 1/2 tsp. baking powder, 1 tsp. salt, 2 Tbsp. canola oil, and 3/4 c. water. Combine all, adding the water slowly, and mixing until you get to the point you need to start kneading. Still form the dough into about 10 equally sized balls and rest about 30 minutes, then roll out, being careful to avoid rolling over the edges (you don't want them to get thinner than the rest of the tortilla, or they'll be brittle), although his dough kept springing back on him, which made getting to an 8 inch diameter a little tough. Cook the same way as above. They were...biscuity. In the second batch, he took the baking powder down to 1 tsp. and rested the dough in the refrigerator before rolling out. Both were improvements - the dough was more cooperative with being rolled out and the flavor was better - but I still liked the lard-based dough better. Mad Kitchen Scientist agreed with me, but I think everyone else - Chef Spouse, the IAs, The Executive Committee - preferred the non-lard tortillas.


Unlike with corn tortillas, you don't want to store flour tortillas under a tea towel. While the steam created by the heat keeps the corn tortillas pliable, steam with flour-based dough just makes it get pasty spots. Yuck.

Papa IA, whose job, we've all decided, is to encourage us to push the envelope, came up with a plan for cocoa tortillas. We based it on Diana Kennedy's recipe, half batch: 7 oz. flour, 1 oz. unsweetened cocoa powder, a solid shake of cayenne, a solid shake of cinnamon, 2 oz. lard, and a little less than 1/2 c. of water with 1/2 tsp. salt dissolved in it. Combine the flour, cocoa, cayenne and cinnamon, cut in the lard, add the salt water slowly to form dough, shape into more like 6 balls, rest, roll out, cook. They were really good, and would be excellent as a wrapping for mole. Papa IA also discovered that sprinkling on a little powdered sugar and then dipping in a Mexican anise liquor he'd brought was delish as well.


On the tortillas, we ate Mad Kitchen Scientist's pork chili verde and Chef Spouse's flank steak fajitas. To drink? The Executive Committee brought the makings of sangria, and Chef Spouse and I had found the first blood oranges of the season, which we juiced for blood orange margaritas.


What did we learn? Simple but not easy, flour tortillas can be learned in an afternoon, but they'll take some time to master. With our Super Bowl party coming up in two weeks, we'll be eating a lot of Mexican food so Chef Spouse can keep practicing. Also, Chef Spouse needs a cast iron griddle.

19 January 2012

Croissants

I've been testing various recipes for croissants lately, and I thought it would be fun to share Julia's French Chef episode where she makes them:


Next lab goes down Saturday!

18 January 2012

SOPA Blackout Day

Food Lab is participating in a national online blackout on January 18th, 2012 in opposition of both the PROTECT-IP and SOPA bills.

If these bills pass, the U.S. government will have the ability to block any website—including any funding partners and external websites that link to the blocked website—based on accusation alone from a copyright holder.

Go to AmericanCensorship.org to learn more about these bills and how our Internet freedoms are at risk.

Bookmark and Share

02 January 2012

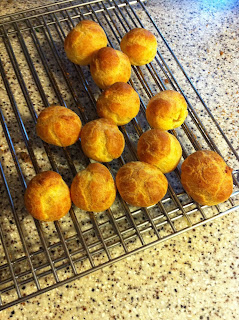
Food (Mini) Lab 13: Choux Pastry

Pate a Choux has a reputation for being...difficult. Like a beautiful but high maintenance woman, before approaching it, you tend to ask yourself, "Is this really worth it?"

To that, I say: "Hot from the oven gougeres? Not worth it? Are you CRAZY?"


Also, here's a secret: choux pastry isn't that hard.

Really.

Pre-heat the oven to 400 degrees.

Take 4 eggs out of the fridge (they need to come to room temperature).

Boil 1 c. of liquid (all milk, milk and water, or milk and stock for savory applications) with 1/4 lb. of butter (cut up) and about 1/2 tsp. of salt over medium heat.


While still over the heat, stir in 1 c. of flour. It's going to look, as Chef Spouse pointed out, like a bechamel sauce gone wrong. Don't worry - keep stirring! Eventually, it will get kind of satiny looking. When that happens, turn off the heat.


Let the choux cool slightly.

Pop it into a bowl and start mixing in the eggs one at a time. Initially, the egg/dough mixture is going to look weird, and you'll be thinking that the dough is messed up and not going to come together. Don't worry - keep stirring! Once the first egg is incorporated, keep doing the same with the other three eggs. At the end, you'll once again have a lovely satiny dough.


Then you load up your pastry bag, pipe your choux onto a baking sheet, and pop it in the oven. 10 minutes at 400, then 20 minutes at 350, then flaky pastry goodness.

What should you pipe it like? Depends on what you're going to do with it - you can pipe it into 1-2 tsp mounds for savory or sweet fillings, rectangles for eclair applications, a ring for a pastry cake (see Julia Child's The Way to Cook for an example) - whatever you like.

What should you fill it with? The Mad Kitchen Scientist had pre-prepared mushroom duxelles and a Moroccan lamb thing for the New Year's Eve party. Of course, ice cream (for profiteroles) or cream (for cream puffs) are traditional sweet fillings. You can mix cheese into the dough before cooking for gougeres. We were speculating that you could make LARGE puffs as a basis for poached eggs. Really, the only limit is your palate/imagination.

So don't be scared - ask that pretty lady to have a drink. Appearances can be deceiving.