24 April 2019

Food Lab 46: Onions (plus a guest star)

In spring, a young man's fancy may turn to thoughts of love, but your Food Labbers got thinking about onions. 

Alliums, and onions in particular, are one of the most common ingredients in savory foods of all kinds. Both Mad Kitchen Scientist and Chef Spouse have cutting boards dedicated just to alliums (because the last thing you want to do is cut up strawberries on a board that retains essence of garlic no matter how many times you wash it). Even if you're not sure what you're making for dinner, starting by mincing some garlic, dicing a shallot, or chopping up an onion is rarely going to be a waste of your time.

The thing is, we rarely pay much attention to our alliums. And there are so many varieties! Chives, garlic, scallions, spring onions, shallots, leeks, pearl onions, cipollini onions, white/yellow/red onions, sweet onions, Spanish onions, Vidalia onions, and of course, that elusive, delicious signifier of the season (and our special guest on Sunday) - ramps. 
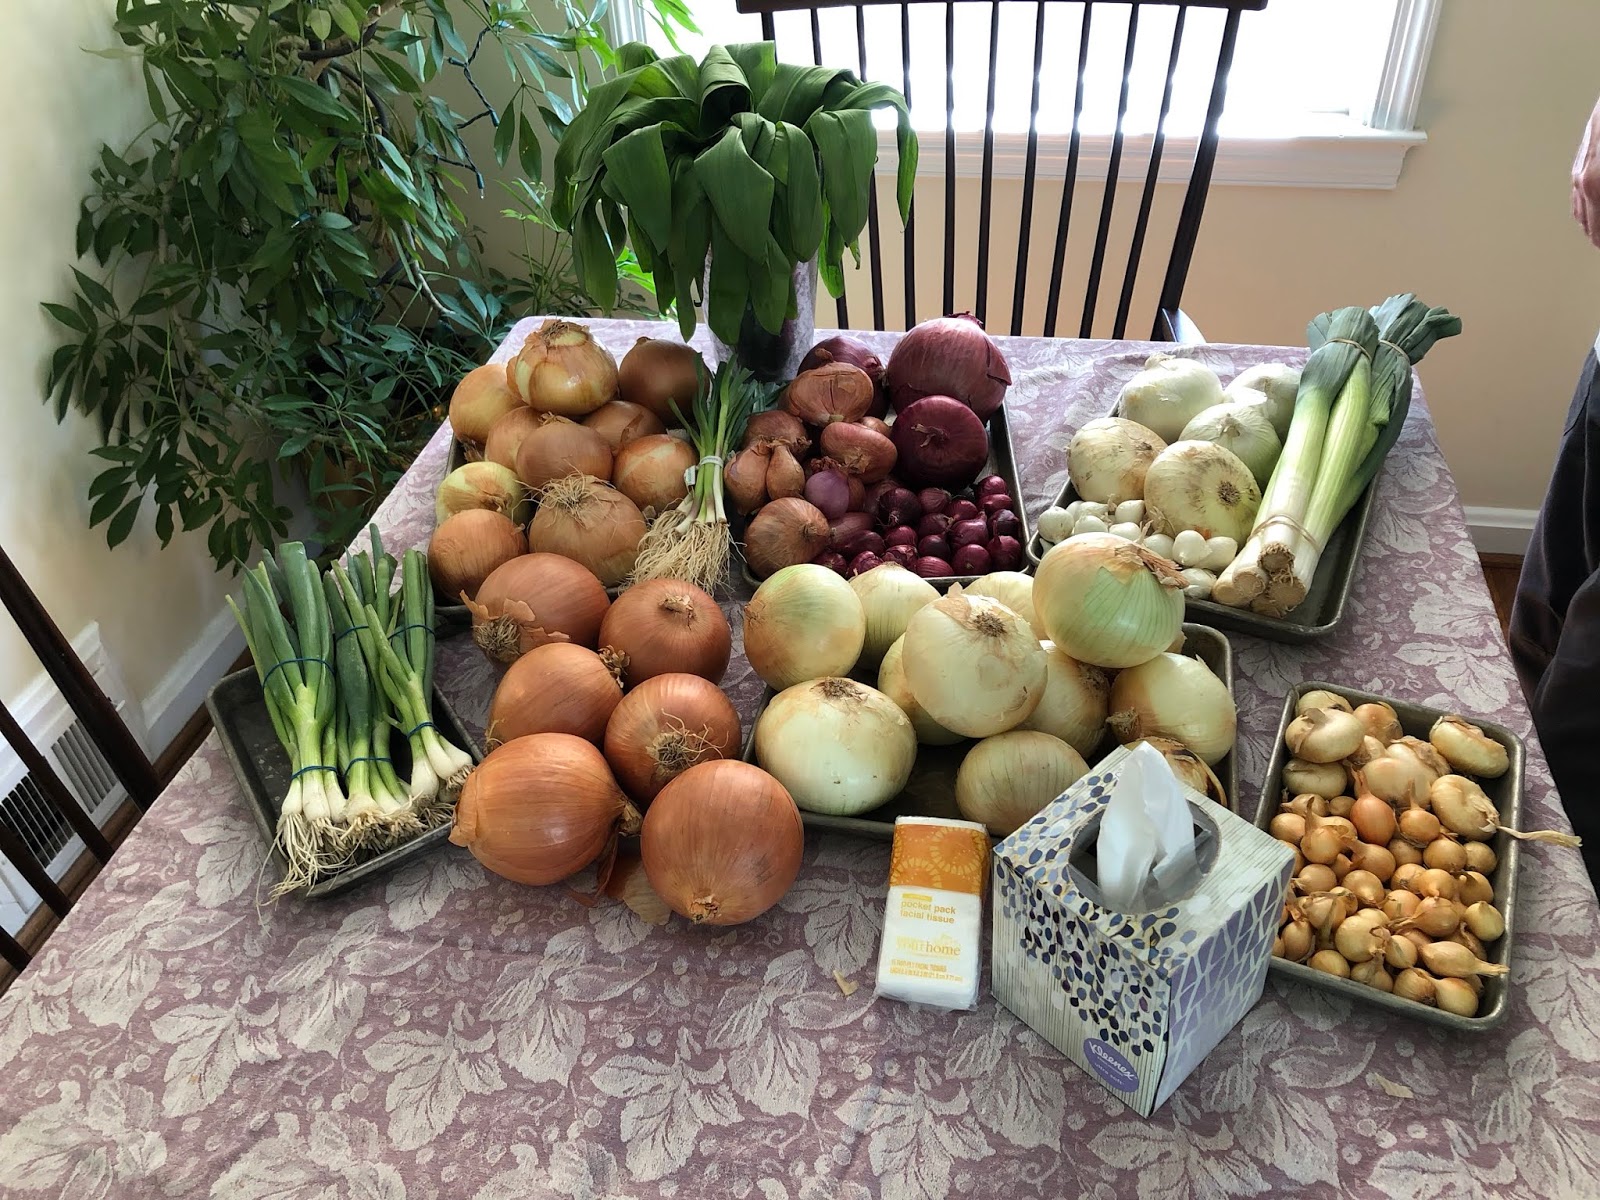
Check out the tissues - we came prepared.
Sure, there are some rough associations: scallions as a finishing element, raw - shallots for French techniques and pan sauces - garlic that features prominently in Italian and Chinese cookery. But most of us just grab a string bag of onions and a bulb of garlic in our weekly run to the grocery store and figure we're good to go for another week's worth of dinners.

So we started with testing taste: Do they taste different? Yes, that meant tasting them all raw.

That's a LOT of raw onions, son. 
Short answer: they definitely all taste different, and the Food Lab crew highly recommends you do your own taste-off, preferably with a group that's also tasting with you, so you're not the only one with dragon breath at the end.

A few tasting notes:

Ramp tops are amazing - mildly peppery like really young arugula, but more more tender, and with a freshness that screams "SPRING!" If you get your hands on ramps in the spring, the temptation is to toss them with good olive oil, salt, and pepper and lightly grill them, and I won't judge you if you do. But you might want to consider - just consider - chopping the tops into a salad and then pickling the bulbs. 

Scallions really should never be cooked.

Cipollini onions are supposed to be sweeter than regular onions. That's a lie - at least with the ones we had. The zing on the palate was wasabi-level WHOA. I believe The Executive Committee may actually have been crying for a moment. 

If you're going for raw applications, you REALLY want to look for Vidalia or sweet onions. If you can't find them, red onions will work, but the Vidalia and sweet were definitely more mild and sweet, delightfully crunchy, and almost a bit creamy.

There wasn't as much difference in taste between pearl white, yellow, and red and regular sized white, yellow, and red as I would've imagined.

We then caramelized all the main varieties separately to see if they maintained their taste differences. 

Caramelization is about slowly cooking off all the water in the onions until they're a sweet and savory brown mass of umami goodness while also avoiding generating a Maillard Reaction. So low and slow, use cast iron, and salt early (remember, you're trying to cook all the water off). Also, set aside 45 minutes - one hour. No rushing! 

You cannot IMAGINE how good the kitchen smelled
One of the surprising differences was how much water the varieties contained. We started with precisely 565 g of each type, cooked in 2 TBSP butter, and identical amounts of salt. Most varieties, when the water was cooked off, ended up around 150 g. Not the Vidalia and the red onions though - they both ended up more like 250 g. Less water in the onion --> higher yield after caramelization. 

The sweet and Vidalia onions retained their distinctive creaminess and were more mild and subtle in flavor overall after caramelization. The rest of the varieties tasted pretty similar, other than the red onions, which were both strong and sweet and retained a little more structural integrity than the other varieties - see above, RE: less water. 

So once we had an absurdity of caramelized onions, then what? 

Caramelized onions freeze really well, in your handy-dandy ice cube trays, and we did plenty of that, for later use in any and all egg applications and grilled cheese and pan sauces and finishing soups. But we needed to make something we could eat - Food Labbers cannot live by raw onions alone (for which everyone else who knows or encounters us is deeply grateful).

We opted for galettes, which are basically pizzas that you make on pastry dough, or very rustic tarts. One variety was caramelized onions, Gruyere, green garlic and ramp leaves. The other was fig spread, caramelized onions, leeks, and blue cheese.


Of course, we grilled some ramps, and The Executive Committee made a lovely spring salad of radishes, snow peas, ramp tops, and ricotta salata (she is, after all, the one who makes sure we eat our veggies).

All this is pretty standard order. You know Mad Kitchen Scientist and I couldn't leave it at that. 

What's missing? 

Dessert. 

Oh yes we did make caramelized onion ice cream - vanilla custard base, the Vidalias, and toasted pecans. It was un-fucking-believable. So very, very good. This should definitely become a food trend, and if it does, make sure you point out that we discovered it first. 

Onion ice cream. It's a thing (or should be).
What did we drink? Gin, of course, first blind-tasting Bombay Sapphire, Hendricks, The Botanist, and the FEW barrel aged gins against each other in gibsons with home-pickled pearl onions (my favorite, and still the reigning champ, is Hendricks), then Chef Spouse used some saffron gin he'd picked up for me on a whim that has turned out to be VERY difficult to mix in a light cocktail featuring Cointreau, blanco vermouth, and orange bitters.

Our gin game is strong.
We did one other test, caramelizing onions in the Dutch oven on the Green Egg. As of 8 pm, when Chef Spouse and I had to get home to feed all our beasties, they were nowhere near done. I assume they finished in time for Mad Kitchen Scientist to go to work Monday, but I haven't confirmed yet. For all I know, he's still sitting there by the Green Egg watching the onions cook down and contemplating the universe. At least the weather's been delightful the past three days. 


25 February 2019

Food Lab 45: Almond-Flour Cookies

I grew up outside of Philadelphia, in southeastern Pennsylvania. As such, I had a lot of Italian-American friends growing up. When I was in elementary school, one of my close friends came from a large Italian family that owned a local bakery. One of the first times I went over to her house, her mom made spaghetti with red gravy for dinner. When I was served, I proceeded to cut up my spaghetti into bite-sized lengths. My friend's dad took one look at my mutilated pasta, picked up my plate, scraped the sad little chunks into the trash, refilled my plate, and taught me how to eat my pasta properly, deftly twirling the long strands around the tines of my fork. Thus began my life-long love affair with Italian cuisine.

My neighborhood in DC has undergone significant transitions over the years, one of which was the loss of an outpost of Baltimore's famous Vaccaro's. When that shop shut down, I lost my local connect for cannoli, coconut macaroons, and, most distressing, amaretti.

For those who've never had them, amaretti are the MOST delicious cookie in the world. Crisp on the outside, soft in the middle, with a delicate but pronounced almond flavor and just the right level of sweetness, they cannot be beat.

I've been up in Baltimore twice in the past six months, once for business, once for fun, BOTH times in walking distance of Vaccaro's. So both times, I brought home two dozen amaretti. As I was savoring the last one, I realized: these cannot be that difficult to make. Looking up recipes confirmed it. Clearly, Food Lab: Amaretti was too small a topic.

Ah, but there is another famous cookie made with almond flour and egg whites: French macarons. Conveniently, my bestie is downsizing and recently gave me an all-macaron cookbook she'd picked up on a whim a few years ago. Now we have a worthy Food Lab topic!

The macaron concept is simple (what follows is adapted from Entertaining With Beth).

You will need the following special equipment: a highly accurate digital scale, a fine-mesh sieve, an electric mixer, a pastry bag with a plain round tip, rimless cookie sheet(s) and silpat(s)

Sift 120g very finely ground almond flour + 200g powdered sugar through a fine sieve into a bowl and set aside.


Whip the whites from three ROOM TEMPERATURE eggs until they start to foam, then add a pinch of salt, 50g of granulated sugar (that you can omit if you're finding your macarons too sweet), and 1/4 tsp cream of tartar (do NOT omit this - it's the secret ingredient to REALLY FLUFFY egg whites), and continue to whip them HARD for 8-10 minutes. You basically want the egg whites to end up the consistency of whipped cream, so you're going to need to use an electric mixer or a LOT of elbow grease - I recommend the mixer.


Combine the whipped egg white mixture with the dry ingredients mixture (I found it easier to pour the dry into the whipped eggs), stirring ~70 times with a rubber spatula, then pipe onto silpat-lined rimless cookie sheets. As Beth explains well in the link above, it's important to neither under- nor over-mix your batter. Flaws - cracked cookies, no "feet," cookies that spread out too far - are usually a result of mixing errors.

You can really pipe any size you choose. We went with piping roughly 1 inch diameter rounds, which gave us approximately 60 cookies per batch (so 30 once paired). I would think making them much smaller would be difficult, but you can certainly make them larger if you like.


Bang them on the counter hard a few times to settle any air bubbles, let them rest and set for 30-60 minutes (at which point you can pat down any little peaks you may have created in piping them out), then bake for 20 minutes at 300 degrees. The resting time is also important for the formation of their distinctive "feet." Don't short it.

Once the cookies are cool, take them off the silpat and make little sandwiches by piping on buttercream filling.

We tested the silpat versus a single-tasker macaron mat versus parchment paper. Go with the silpat. The single-tasker is now in the garbage where it belongs, and even the parchment paper sometimes didn't want to release the little buggers.

Basic buttercream: beat 1/2 stick (1/4 c.) room temperature unsalted butter, then slowly add in ~3/4 c. powdered sugar

Now, that all is going to give you a macaron, but it will be kind of dull. How do they make all those pretty colors and flavors you see at bakeries?

Well, the cookie colors are a result of adding food coloring to the eggs while you're whipping them (except in the case of chocolate cookies, which are the result of adding 10g of cocoa powder to the dry mix).

The cookie flavors (again, aside from chocolate) are a result of adding 1/2 tsp of the extract of your choice to the eggs while you're whipping them.

We chose to make vanilla (with extract), chocolate (with 10g cocoa powder), lemon (with extract and food coloring), rose (with rose flower water and food coloring), and coconut (with extract) cookies. We decorated the coconut cookies with a little sprinkle of flake coconut on top before baking (also so we could visually differentiate them from the vanilla cookies).

Chocolate, on parchment paper

Rose (color from red food coloring), on my beloved silpat

Vanilla, on the damn single-tasker, to which several of the cookies stuck
All the cookie batter came out quite consistent OTHER than the lemon. It's possible we whipped the eggs a little less, or it may have been that lemon extract includes some lemon oil. As you can see from the pictures above of the chocolate, rose, and vanilla cookies just out of the oven, the other batters were quite firm and stayed exactly where and as piped, including lumps, bumps, and ridges. The lemon, as you can see in the picture below, was definitely smoother, but it was much harder to pipe (as The Executive Committee discovered to her dismay, having drawn the "pipe" straw for that batch).


You can, of course, also flavor and color your buttercream. In fact, if you flavor your buttercream, you *should* color it so you can identify what's what.

We made the following icings:

  • Hazelnut (adding about 1/8 c. very finely ground nuts)
  • Macadamia (same)
  • Orange (adding about a tsp. of orange extract and food coloring)
  • Cherry (adding 1 oz. Ginja Licor - a Portuguese sour cherry brandy - and food coloring)
  • Coffee whiskey (adding 1 oz. bourbon and espresso powder to taste)
  • Passionfruit (adding about 2 oz. passionfruit puree and food coloring)
  • Rose (adding about 1 oz. rose flower water and food coloring)
  • Chocolate (adding about 2 tsp. cocoa powder)

(We went a little nuts)

We were able to incorporate the nut pastes and cocoa powder without having to put the buttercream back in the mixer. Any time you're trying to incorporate any sort of liquid, don't try to do it by hand - it's a pain in the ass and takes forever. Also, if you add liquid, you're going to need to add a bit more powdered sugar as well. I can't tell you how much - you just have to watch the consistency and add until it's right.

We ended up with the following combinations

  • Chocolate hazelnut
  • Chocolate orange
  • Vanilla cherry
  • Vanilla coffee whiskey
  • Rose rose
  • Rose chocolate
  • Rose cherry
  • Lemon passionfruit
  • Coconut macadamia
  • Coconut chocolate 


We ended up with a total of about 150 macarons. Which, I'll admit, is a lot. 


The universally esteemed winning combinations were:

  • Lemon passionfruit
  • Rose cherry
  • Coconut macadamia
  • Chocolate hazelnut 


You can eat them right away, but they're better if you give them a little time for the filling to meld with the cookie. Store them in the fridge to keep your buttercream firm (but remember to let them warm up before you eat them), or, if you'll be storing them for more than a few days, freeze them.

The sky is really the limit on colorings and flavorings. The cookbook my friend gave me has all sorts of options - savory varieties using ingredients like beets, carrots,  and herbs, various sorts of sweet and savory tea-infused varieties, ganache fillings, jam fillings, caramel fillings, cream cheese fillings, berry fillings, lemon curd...really, once you have the basic technique down, you're only limited by what flavor combinations you find appealing. We all realized we'd missed an opportunity for chocolate mint (either chocolate cookies with mint filling or vice versa). Next time.

What about the cookies that inspired this whole thing in the first place? Did I even make amaretti?

I did, right at the end. As I mentioned, they are dead simple to make (adapted from the recipe at Love & Olive Oil):

Combine 2 1/4 c. almond flour, 1 c. granulated sugar and 1/2 tsp salt in a bowl

Whip the whites from two ROOM TEMPERATURE eggs until they start to foam, then add a pinch of salt, 1/4 tsp. cream of tartar, and 1/2 tsp. almond extract and continue whipping the mixture to soft peak stage (4-5 minutes)

Mix the whipped egg whites into the dry ingredients with a rubber spatula. No need to be gentle - in fact, I ended up basically kneading the dough at the end.

Roll dough into 1 inch balls, roll the dough balls in powdered sugar, space about 1 inch apart on a silpat-lined cookie sheet, bake at 300 for 30-35 minutes. Makes about 2 1/2 dozen cookies.


These are really good cookies. Are they as good as Vaccaro's? No. The consistency is perfect, but I think the almond flavor needs to be stronger. The thing is, almond extract is pretty powerful stuff, so some initial caution is warranted.

All three recipes I found used 1/2 tsp. of almond extract, but one recipe used that for 3 1/2 c. almond flour, and the other used it for 1 c. almond flour, so I chose the midpoint of the three. And since we'd already made FIVE full batches of macaron batter and had to go back to the store TWICE for more powdered sugar, and I used the last of the almond flour for the one batch of amaretti I made, I wasn't about to put the rest of the crew through multiple rounds of amaretti as well. Also by this point, it was after 8 pm, we hadn't had dinner yet, and everyone was starting to get cranky.

Other options I've seen that I'll try in future test runs include:

1. Add the zest of one lemon to the dry ingredients (which I would think might enhance the almondyness of the almond extract)

2. Increase the almond extract to 1 tsp.

3. Keep the almond extract at 1/2 tsp. but also add 1/2 tsp. of Amaretto liqueur (this is probably where I'll start)

4. Use *bitter* almond extract (if you can find it)

Regardless, it looks like I'll be adding a new pantry staple: almond flour.


11 November 2018

Food Lab 44: The Perfect Reuben

Having on hand a 4 pound chunk of brisket, curing salt (aka “pink salt”), and a Big Green Egg, one’s mind drifts to pastrami. Upon learning than pastrami starts from corned beef (was I the last person to learn this?), Reuben Lab seemed obvious.

It goes without saying that the Reuben is one of the best sandwiches known to humankind, and, sure, we know that corned beef is the typical foundation of a Reuben. But in the spirit of Food Lab, why not try a pastrami Reuben to compare? Plus, a fully homemade Reuben brings together other fermentation activities that warrant regular practice as well.

To prepare the meats and to ferment as needed, this Food Lab had to start well before the actual day of Food Lab.

First off, the sauerkraut. Or more specifically, the sauerkrauts. Would a Reuben be better with a red cabbage kraut? How would a sweet pickled red cabbage fare on a Reuben? I started with the regular kraut: thinly sliced half a cabbage, layered into a ceramic crock with sea salt, celery seed, allspice, juniper berry, and caraway seed. I used the perfect amounts of each, good luck getting those data out of me. After about three weeks, the kraut was sufficiently sour but still a bit crunchy. A couple weeks later, I followed the exact same recipe with a small red cabbage.

Next was making a corned beef from scratch. From the Interwebs, I decided to largely follow Tori Avey’s recipe, although I made a homemade variant of “pickling spice.” The brine for the corned beef used was:
  • 3 quarts of water
  • 1 cup kosher salt
  • 1/4 cup pink curing salt
  • 1 cup sugar
  • 1/4 cup honey
  • 2 cinnamon sticks
  • ~3/4 inch ginger root
  • 2 Tbsp mustard seed
  • 1 tsp whole allspice
  • 1 tsp whole black peppercorns
  • 1 tsp whole cloves
  • 2 tsp fennel seed
  • 1 tsp dill seed
  • 4 tsp whole coriander
  • 1 tsp ground mace
  • 4 bay leaves, crumbled
  • 4 cloves of garlic, roughly chopped
  • 1 whole dried red pepper
After heating the brine until all the sugar and salt dissolved, I cooled it back down, dropped the chunk o’ brisket in and put it in the fridge. Five days later (yes, flipping the beef daily as recommended), I removed the now-corned beef, drained it for a few minutes, then into a Ziploc and into the freezer.

Fast forward to Food Lab eve morning, we soaked the defrosted corned beef to desalinate it. In the evening, after cutting off a chunk of corned beef (to compare to commercial corned beef), we gave the beef a good rub (below) to rest overnight.

Into the spice mill and grind:
  • 4 Tbsp whole black pepper
  • 1 Tbsp whole coriander
  • 2 tsp minced, toasted onion
Then add:
  • 1 Tbsp brown sugar
  • 1 Tbsp paprika
  • 2 tsp garlic powder
  • 1 tsp mustard powder
Then we proceeded to day-of meat preparation:

For the home-corned beef, I boiled the small chunk of meat for about an hour and 45 minutes (thinking the boiling time should be somewhat scaled to size). The commercial-corned beef was boiled for three hours. Upon tasting, the flavor of the home-corned beef seemed richer, but the fat didn’t seem to fully infuse all the meat. So perhaps the shortened boiling time was an error (albeit not so severe as to lead to ordering pizza).

For the pastrami, it was smoked for about four hours in the Egg at ~225 °F, until the meat reached an internal temperature of 165 °F. After about an hour’s rest for the meat, we steamed the pastrami for about two hours. About all I can say is “yum.”

The next variable to prepare for: regular caraway rye or pumpernickel? So I made two “torpedo” loaves of sourdough pumpernickel bread and two regular-style loaves of milk-based (soft crumb) caraway rye.

Pumpernickel Sourdough Rye
  • About 3 cups of freshly fed sourdough starter
  • 2 cups of pumpernickel flour
  • 1 cups of whole wheat flour
  • 1+ Tbsp salt
  • ~2 Tbsp caraway seed
  • About 2 cups of all-purpose flour
With those ingredients, I made a sponge the weight of a thick batter and left for an overnight rise. For each of two halves of the sponge, we kneaded in about about 1/2 cup of flour to form the torpedo loaves. After a second rise of about three hours, the loaves were baked at 425 °F directly on a stone, spritzing some water into the oven at the beginning of the bake. For these loaves, I might have added a bit more flour and kneaded each loaf a bit longer before the second rise, because the loaves as baked flattened out a bit. They still had a decent lightness, but made for skinny sandwiches.

Caraway Rye Bread
  • 1 1/2 cups of milk
  • 1 1/2 cups of water
  • 2 Tbsp yeast
  • 3 cups rye flour
  • 1 cup whole wheat flour
  • 1 Tbsp salt
  • 1/4 c caraway seeds
  • Enough all-purpose flour to make a decent dough (about 2 cups)
After the first rise of almost two hours, I kneaded a bit more flour into the dough and placed in two 9” loaf pans. After a second rise of a bit over an hour, the loaves were baked at 375 °F for roughly 40 minutes.

Finally, with all the elements assembled (thinly sliced Bavarian Swiss cheese and homemade Thousand Island dressing, based on this recipe but using homemade mayo, and with more garlic, shallot in place of the onion, and added Worcestershire sauce and sriracha, filled out the basic ingredients), we were ready to assemble our Reubens and test our variables...

First test: griddled vs ungriddled Reubens, classic ingredients (caraway rye, corned beef, regular kraut, cheese, and Thousand Island). Quick and simple outcome: griddled wins.

Second test: corned beef vs pastrami on caraway rye. Though we all loved the pastrami eaten out of hand, the Reuben was actually better served by the corned beef rather than the pastrami. Across the board, we all favored the traditional.

As we started thinking about additional testing, some other friends piled in and we started making different variations and serving ‘em without formal tasting and comparison. It did seem that the red kraut was well received, and the pastrami Reuben on the pumpernickel seemed popular. The pumpernickel maintained better structural integrity for the sandwiches as well. Our guests brought some excellent potato salad and cucumber salad, to join the green salad with pomegranate arils and walnuts and various and sundry pickled yummies.

Meanwhile, Chef Spouse plied us all with tiki drinks, details of which I’ll have to leave to another correspondent...


10 July 2018

Food Lab 43: Hawaiian Cuisine


Last winter, Chef Spouse and I celebrated a milestone anniversary with a trip to Hawaii. We spent our first week on Kauai, and our second week on Oahu. I don't have enough time to tell you all the things that were wonderful about the trip (although perhaps the above photo, of what was functionally our private waterfall, beside which we drank our coffee every morning we were in Kapa'a might provide a clue), but one thing we loved in particular was our Hole In the Wall food tour of Honolulu's Chinatown (and thanks to one of my good foodie friends for recommending it).

After consuming kalua pork and manapuas and saimin and a zillion varieties of poke and shave ice and Leonard's famous malasadas and Liliha's equally famous coco puffs and fresh-made chow fun noodles and discovering the wonder that is li hing powder (and buying a GIANT bag of it to bring home), Chef Spouse and I knew we'd want to try to recreate some of these dishes at home.

Obviously, that full list is a little too, well, full, and this time (for once) we exercised some restraint BEFORE we committed ourselves to making 4,365 dishes in one day. From that list, Chef Spouse selected manapuas (which involved making regular kalua pork and char siu style pork) and poke (four varieties - tuna and salmon, traditional soy-based and spicy). I also wanted to make malasadas with guava and lilikoi (passionfruit) filling, but I got over-ruled, not least of which because Mad Kitchen Scientist has already made from-scratch ice cream sandwiches with from-scratch hazelnut ice cream (verdict: the Good Humor version can suck it).

Mad Kitchen Scientist took over prepping the kalua pork, and Chef Spouse and I took on sourcing the  fish for the poke.

Kalua pork recipes are interesting. They don't tend to start in a smoker, but rather recommend liquid smoke, Hawaiian alaea salt, and a slow cooker. And it *is* supposed to be quite soft. But Mad Kitchen Scientist has a Green Egg, so we decided to do the salt sub as prescribed, skip the liquid smoke, and smoke the pork, THEN put it in the slow cooker overnight. That turned out to be a good plan. The pork was resting in the slow cooker in its cooking liquid (aka FAT) when we arrived, and when we pulled it out shortly thereafter to sample, it was DELICIOUS.


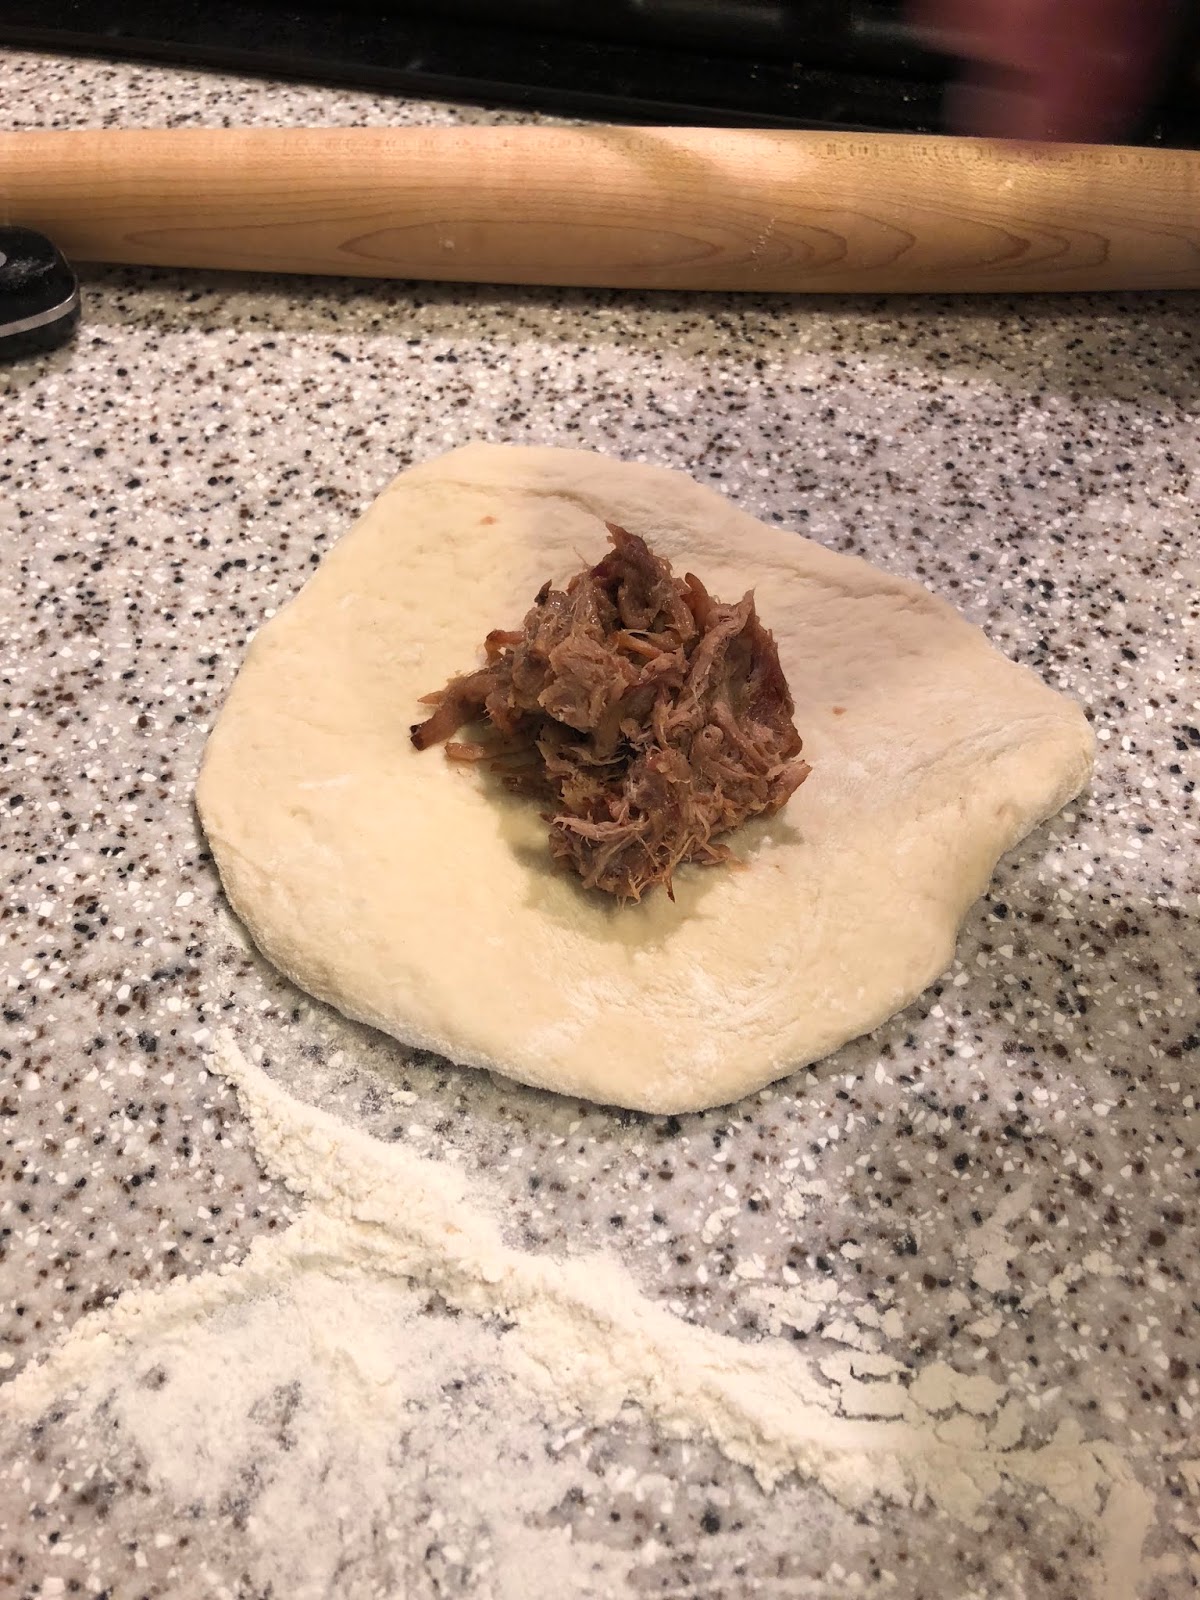
You can put all sorts of things in manapua, but we opted for some of the kalua pork just as it was and some turned into more of a chai siu (Chinese barbecue) style pork. Inspired by the recipe at Genius Kitchen, we made Chinese barbecue sauce and dressed a pile of the shredded kalua pork with it.


That was all pretty straightforward.

The manapua dough, on the other hand, was not. Actually, making the dough was quite simple. We followed the recipe at Genius Kitchen and did two risings (each about an hour outside the fridge, although I would be interested in trying it again with the slower cold rise). The place we ran into trouble was with the "divide dough into 12 pieces" instructions. The dough uses six cups of flour.


Those look reasonable, right? I'm really kicking myself that I didn't get pictures of the manapuas post-steaming because they were ENORMOUS. Manapuas are supposed to be a palm-sized snack (or breakfast). Because they were so large, the ~15 minute steaming time instruction was not enough, either - several of the first batch came out unpleasantly raw doughy, so those went BACK in the steamer with the second batch.

Verdict: I want to try these again, but I either need to make a LOT less dough or cut it into a LOT more pieces.

The poke was pretty straightforward, particularly given our previous runs at raw meat. Buy good quality fish, cut it carefully, dress it yummily. Traditional poke uses a soy base. What else you add is pretty much up to you: furikake, fresh ginger, lime, onions or scallions (or both), avocado (or not), maybe a little sugar (for sweetness) or crushed red pepper (for spice), maybe top with a little fresh cilantro, or some fried shallots or garlic for crispiness, maybe serve with some sushi rice (for a poke bowl) or in nori (for a hand roll). We made tuna and salmon, and I thought the salmon was better, but they were both quite tasty.

However, I insisted that we had to make Foodland-style spicy poke, too. If you're never been to Hawaii, Foodland is a local grocery chain. "Wait! You're getting RAW FISH from the deli counter of a restaurant?" Damn right - Foodland has about a dozen varieties (or more) at any time, and they're all fresh and delicious. When we were on Kauai, we were staying in a cottage, so we made ourselves dinner many nights. We'd have our coffee by our waterfall, climb back up to the cottage where, coming through the yard, we'd pick fresh organic oranges and tangerines to squeeze for breakfast (and feed some deadfalls to the owners' pet pig Lucy), go out and hike or snorkel or kayak, and swing into Foodland in Kapa'a on the way home to pick up some poke to nosh on while we grilled our fish and cooked our veg, accompanied by daiquiris made with fresh organic limes from the yard and local Koloa rum. Yeah, you right.

The main difference is that you still marinate your fish in a soy base, but then you add a Sriracha and mayo combo sauce and, if you're feeling ritzy (which we were this weekend), some tobiko. It was SO GOOD.

(The poke was actually all so good that I neglected to take photos. Oops.)

This summer, I also challenged Chef Spouse to up his tiki drink game. Tiki gets kind of a bad rap, due to too many crap, processed, high-alcohol-and-not-much-else-to-recommend-it "tiki" drinks. Having had the opportunity to visit several authentic tiki bars in the past few years, I've learned that REAL tiki drinks are works of art that showcase an incredible range of rums, matched with complex combinations of freshly squeezed juices, accent alcohols, bitters, spices, and (ideally) from-scratch syrups (like homemade grenadine and orgeat).  To get a sense of the potential of tiki, I highly recommend checking out the Smuggler's Cove book. Chef Spouse used it as a guide to make us Dr. Funk, Planter's Punch, chartreuse swizzle, and hibiscus punch (using the homemade hibiscus liquor Mad Kitchen Scientist made with some of the MASSES of dried hibiscus flowers we had leftover from our homemade bitters lab). Incidentally, Dr. Funk may be my new favorite cocktail. Don't let the list of ingredients in tiki drinks intimidate you - most are relatively easy to come by (although you almost definitely WILL have to augment your rum holdings), and even the "make it yourself" stuff isn't too challenging (well, other than the orgeat - that's a bit of work, but it really is better than the bottled stuff).

I guess I'll have to do malasadas another time.

08 June 2018

RIP Anthony Bourdain

Your gonzo approach to food and life was a major inspiration to the Food Labbers.


A few personal favorite quotes:

  • Good food and good eating are about risk. Every once in a while an oyster, for instance, will make you sick to your stomach. Does this mean you should stop eating oysters? No way. The more exotic the food, the more adventurous the serious eater, the higher the likelihood of later discomfort. I’m not going to deny myself the pleasures of morcilla sausage, or sashimi, or even ropa vieja at the local Cuban joint just because sometimes I feel bad a few hours after I’ve eaten them.
  • Margarine? That’s not food. I Can’t Believe It’s Not Butter? I can. If you’re planning on using margarine in anything, you can stop reading now, because I won’t be able to help you.
  • I do think the idea that basic cooking skills are a virtue, that the ability to feed yourself and a few others with proficiency should be taught to every young man and woman as a fundamental skill, should become as vital to growing up as learning to wipe one's own ass, cross the street by oneself, or be trusted with money.

You had more impact than you knew.

13 February 2018

Food Lab 42: Alkaline Noodles

It's been quiet on the blog, but that's because your intrepid Food Labbers have been quite busy.

Mad Kitchen Scientist has changed jobs.

Chef Spouse and I spent two weeks in Hawaii celebrating a milestone anniversary.

I've been on several business trips (including two outside the US - fancy!).

We shared a peaceful Friendsgiving together at which we had the same number of desserts as we had guests, and a unique desert tipple to pair with each. (Apparently, Mad Kitchen Scientist and I are trouble together at the liquor store AND the fish market.)

We prepared our usual themed New Year's Eve feast with Mad Kitchen Scientist and The Executive Committee for their annual party (this year: nouvelle Russian, to prepare us for our new overlords, comrade).

We put on the annual Super Bowl party, and this year, winning their FIRST Super Bowl ever and ending a 57 year conference championship drought, celebrated the victorious Philadelphia Eagles! But we did not have as good a day as Jason Kelce, who truly was living his best life.

The man is wearing an authentic Avalon String Band
Mummers costume WHILE RIDING A BIKE
We also had the opportunity to use our cooking skills to benefit some members of our local community here in DC, and Mad Kitchen Scientist and The Executive Committee visited and re-created Chinese banquet for International Dilettante and Dr. Fruit Bat.

But after all that cooking and eating and drinking and serving and celebrating and traveling fun, we decided it was time to get back to labbing this past weekend.

Several years ago, a tiny ramen joint opened in our neighborhood. Turns out, it's outstanding - some say, better than Momofuku (I would be one of those). Chef Spouse has been obsessed by ramen ever since.

Here's the thing: it's always a long wait for a table there (it is TINY, no joke), but they do carry out, and you can easily order kaedama (extra noddles) for your leftovers for lunch the next day.

But he wants to make his own anyway, because that's how we do. (Hey, if you're a regular reader, you already know that.)

Ramen has four basic components:

  1. Broth
  2. Tare
  3. Noodles
  4. Guts/goodies

Chef Spouse has made some progress on a rich pork stock to form the basis of the broth. And he's messed around with pork belly (and Mad Kitchen Scientist's homemade kimchi and nori and soft-boiled eggs and kale and homemade pickles) for the guts/goodies on top. But he hasn't really worked on the tare or the noodles yet.

Here's the thing, though: I can't remember the last time I had pasta from a box. Chef Spouse makes fresh pasta ALL THE TIME. In fact, he's so fast at making it now that he puts the water on before he starts and he has the noodles ready to go before the water boils.

But you start reading recipes that call for kan sui (lye water), sodium carbonate, or potassium carbonate, and you get scared off. LYE IS DANGEROUS STUFF, YO.

We resolved to overcome our fears and give it a go.

In theory, you can get kan sui at an Asian market, but we have several VERY well stocked examples nearby and struck out at all. Potassium carbonate is something you have to order online.

But sodium carbonate is another story. All that is is baking soda (sodium bicarbonate) that's been baked in a 200 degree oven for about an hour, which bakes off water and carbon dioxide. Voila! Sodium carbonate!

Interestingly, Chef Spouse had baked up a batch probably two years ago, and it's been sitting in the pantry patiently waiting ever since. We also had about two quarts of pork stock hanging in the freezer.

For our Lab test, we tried the following:

Test 1 - old sodium carbonate
2 3/4 c. all purpose flour
3/4 c. water
1 tsp. sodium carbonate
1 tsp. salt

Test 2- new sodium carbonate (baked fresh that day)
2 3/4 c. all purpose flour
3/4 c. water
1 tsp. sodium carbonate
1 tsp. salt

Test 3 - MORE sodium carbonate (new stuff)
2 3/4 c. all purpose flour
3/4 c. water
1 1/2 tsp. sodium carbonate
1 tsp. salt

Test 4 - commercial ramen

Yep, this stuff:


Noodles only! Not the "flavor" packet. Anyone else flashing back to college?

All the sites we checked warned that the dough is dry and hard going in the kneading, and they were right. Start it in your Kitchen Aid with the dough hook and let horsepower do the job as long as you can. We took dough out when the dough hook stopped making any progress on forming it into a whole, and then had to knead each by hand for another ~5 minutes, which doesn't sound long, but this is TOUGH dough. As one site we read noted, "If you're not sweating, it's not ready yet."

We then rested them for ~20 minutes each, wrapped in plastic wrap.


When the dough came out of the plastic wrap, it was significantly more supple.

We also tested making two thicknesses of noodles. In the first test, we rolled the dough to the "five" setting on the Kitchen Aid before cutting. For the second test, we rolled it only to the "three" setting.


In handling the dough, there wasn't much difference between the old and new sodium carbonate batches. The MORE sodium carbonate batch was different, though - much less smooth.


Then we cooked them all - including the Top Ramen - in batches in the pork stock. We didn't mess around with tare or guts because we were trying to assess the noodles qua noodles.

We all agreed that the fresh sodium carbonate noodles had the best texture. The MORE sodium carbonate noodles had a slight off flavor. The Top Ramen had the customary curly texture (how DO you do that with fresh noodles? we couldn't figure it out), and were lighter but less flavorful than fresh, and oddly sweet. Opinions differed on preferring thin to thick (I thought the thick seemed a little gelatinous, but not everyone agreed). All stood up well to the broth over time - they didn't get mushy at all.


To go with? Mad Kitchen Scientist had gone pig-crazy (in fairness, we started it by tasking him with picking up and smoking a pork shoulder for a fundraiser we're hosting this coming weekend), so we had Chinese red pork and roasted pork belly to nosh on the side.


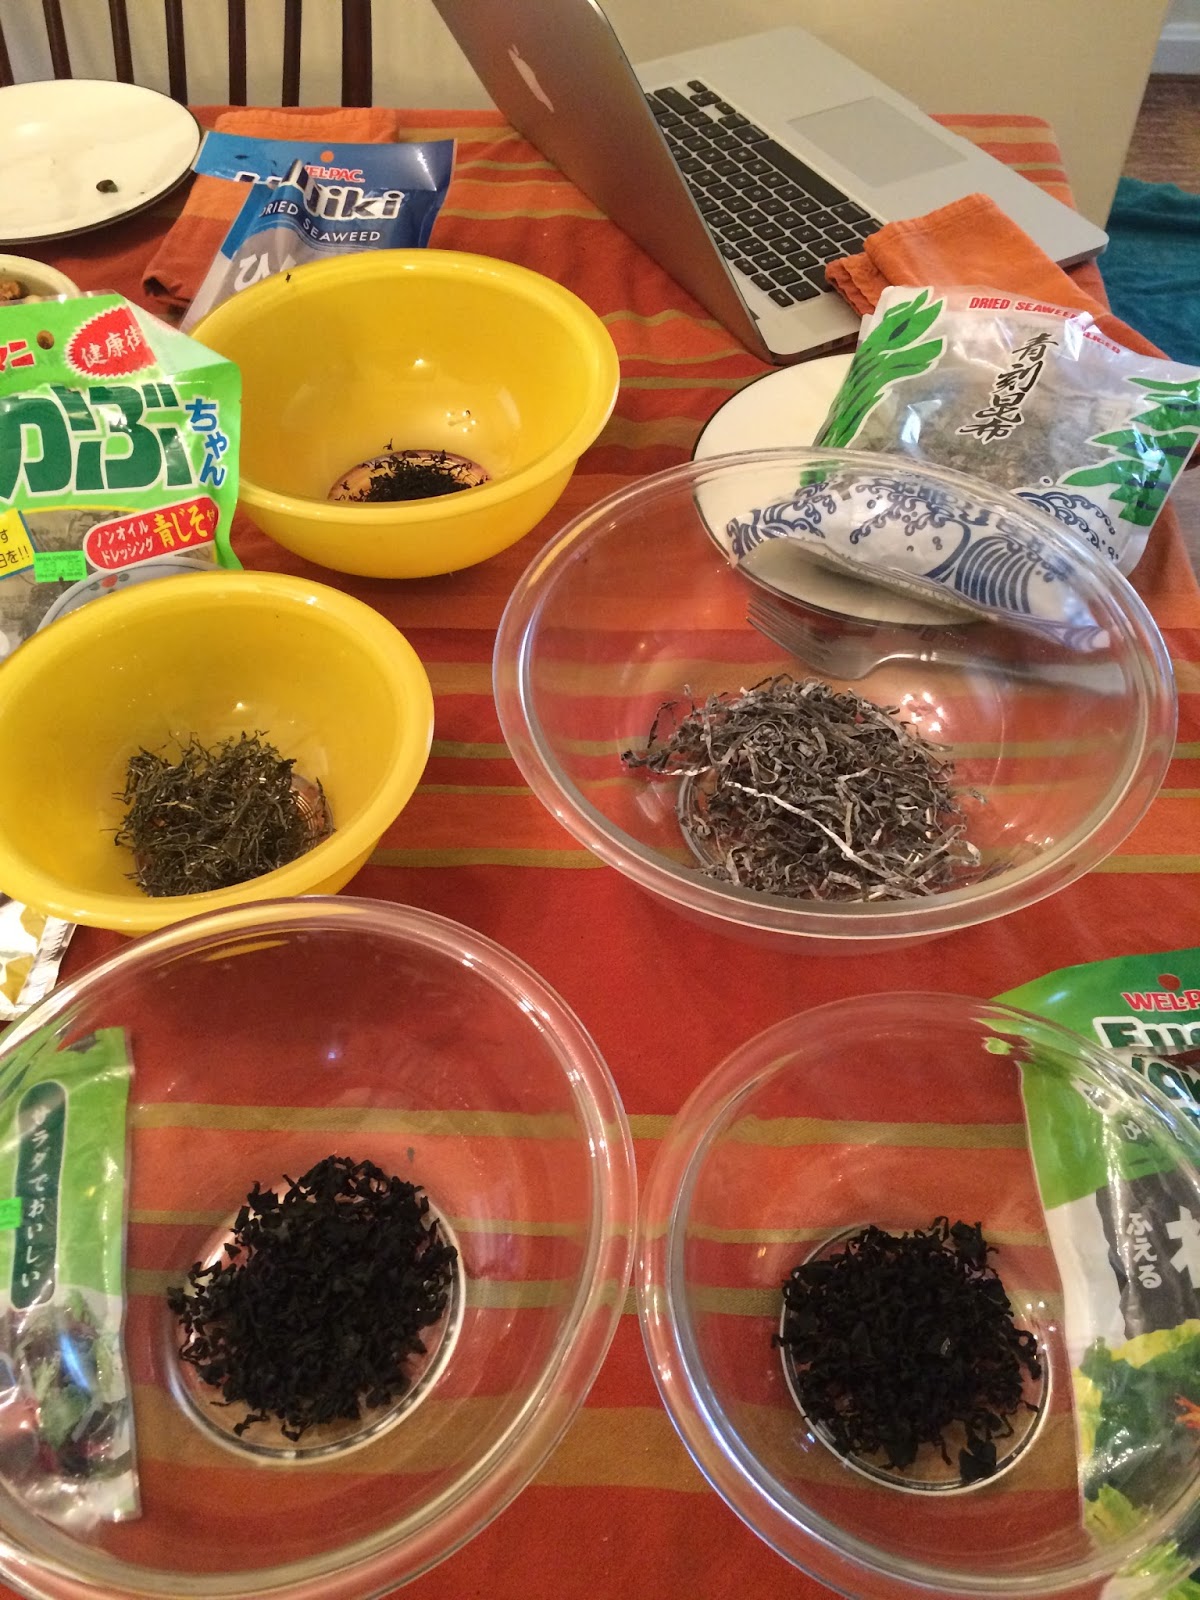
We experimented with making seaweed salad from scratch, too. Since the packages were mostly not labeled in English, we just picked up a variety. First step is to reconstitute the seaweed with hot water - and man, did the dining room smell like the ocean when we did - and then drain it and squeeze out as much water as possible.


Then you just create a basic dressing of Asian flavors - sesame oil, soy sauce, etc. (we also used rice vinegar, ponzu, honey, and some grated ginger), dress it, add sliced green onions and sesame seeds, done. We had picked up some prepared seaweed salad to compare it against. We hadn't lucked on grabbing the same type of seaweed you usually find in ready-made seaweed salad, and I do love the texture of that type, so that was a bummer. But the flavor of the homemade, by comparison, was much better. Once we had it to compare, we realized that the stuff you normally get at sushi joints is REALLY REALLY sweet.


Commercial on the left - homemade on the right
All the delicious nibblies (including some tiny pickled octopus
we picked up and a quick spicy Napa slaw with sriracha pickled radishes)
What did we drink? Chef Spouse started us out with a rum-based cocktail with ponzu and pimento bitters, garnished with lychee. Mad Kitchen Scientist had taken some of the absurdity of dried hibiscus flowers we were left with from making homemade bitters (which I never wrote about, because there really isn't much to say - you buy a bunch of odd ingredients from places like Mountain Rose Herbs, put really small quantities of them in Everclear, and wait) and turned them into a hibiscus liquor (rum based, with some "warm" spices and a little honey), and Chef Spouse was messing around with rum and rye and bitters and citrus, and what we eventually realized is: just put the hibiscus liquor in a glass with some silver tequila. Simplicity on the other side of complexity, my friends.

What we learned is that it takes a little longer to make fresh alkaline noodles than fresh pasta - but not much. They taste a lot better than Top Ramen. And you can do it with ingredients you already have in your kitchen, so don't be afraid of the mad chemist-sounding names.

(But Chef Spouse ordered some potassium carbonate and kan sui from Amazon anyway.)


07 November 2017

Food Lab 41: Dim Sum

As you might have guessed from my previous Lab post, the Chinese Banquet lab was a bit of a blur. The Pathological Entertainer had the full picture of where we were, where we were going, and how we were going to get there in her head, but the rest of us were merely the sous, following her instructions as we moved from task to task. And we brought it off - 8 courses totaling 15 different dishes, all prepared in about 6 hours, and none of us too exhausted to enjoy eating the meal.

We figured we better hit some of these again pretty soon to solidify our techniques. And it turned out to be a good thing we did, because we still need some work on a few.

Our Dim Sum menu consisted of:

  • Red stewed eggs
  • Roast pork loin (which Mad Kitchen Scientist and The Executive Committee prepared in advance)
  • Sichuan eggplant
  • Momofuku-style pork buns (with two different pork belly preparations to fill them)
  • Salt and pepper squid (that ended up being salt and pepper octopus, because I bought the wrong cephalopods at the fish market)
  • Potstickers (shrimp, veg, and pork)
  • Shao mai (shrimp, veg, and pork)
  • Rambutan for dessert 
I think the rambutan look kind of like sea urchins.

Following The Pathological Entertainer's lead, we did this in three major courses: eggs, pork loin, and eggplant; buns and octopus; dumplings.

As I mentioned, the pork loin arrived ready to eat, so our first course prep was fairly simple: red stewed eggs and the eggplant (provided by a volunteer plant in The Executive Committee's garden).

Red stewing is a simple technique. For eggs, you hard boil them, peel them, and them simmer them in enough liquid to cover in roughly the following proportions

1/3 c. soy sauce
1 1/2 c. water
1 Tbsp. red wine vinegar
1 Tbsp. dry sherry (or, in our case, shaoxing wine)
Seasonings (in our case, a little sugar, star anise, pink and white pepper corns, quite a bit of sliced ginger)

How long? A while. Once the eggs color up, take one out to taste. If you like it, you're done. If not, let them simmer a while longer. (Oh - and save the liquid when you take the eggs out, because you can use it again.)

Red stewed eggs, stewing

For the Sichuan eggplant, Mad Kitchen Scientist sauted the chopped eggplant with appropriate seasonings (garlic, ginger, jalapeƱos), then sauted ground pork, them combined them with a "combo of Chinese flavors" sauce (I know soy and vinegar went into it, but I'm not sure what else he grabbed - hot bean paste is traditional, sherry or shaoxing wine can go in, chili sauce works, too, as does sesame oil - it's up to you how you like it flavored and how spicy you want it), then cooked it down and topped it with a blizzard of chopped scallions before serving.


Then it was on to the buns. Momofuku-style pork buns are like little steamed bun tacos, rather than being a solid bun with the pork completely encased inside, so the buns and the pork are cooked separately and then combined before eating.

The buns are a yeast dough that has multiple types of leavening (yeast, baking soda, and baking powder), and quite a bit of fat (milk powder or, as we did it, milk and rendered bacon fat), so it's lovely to work with.

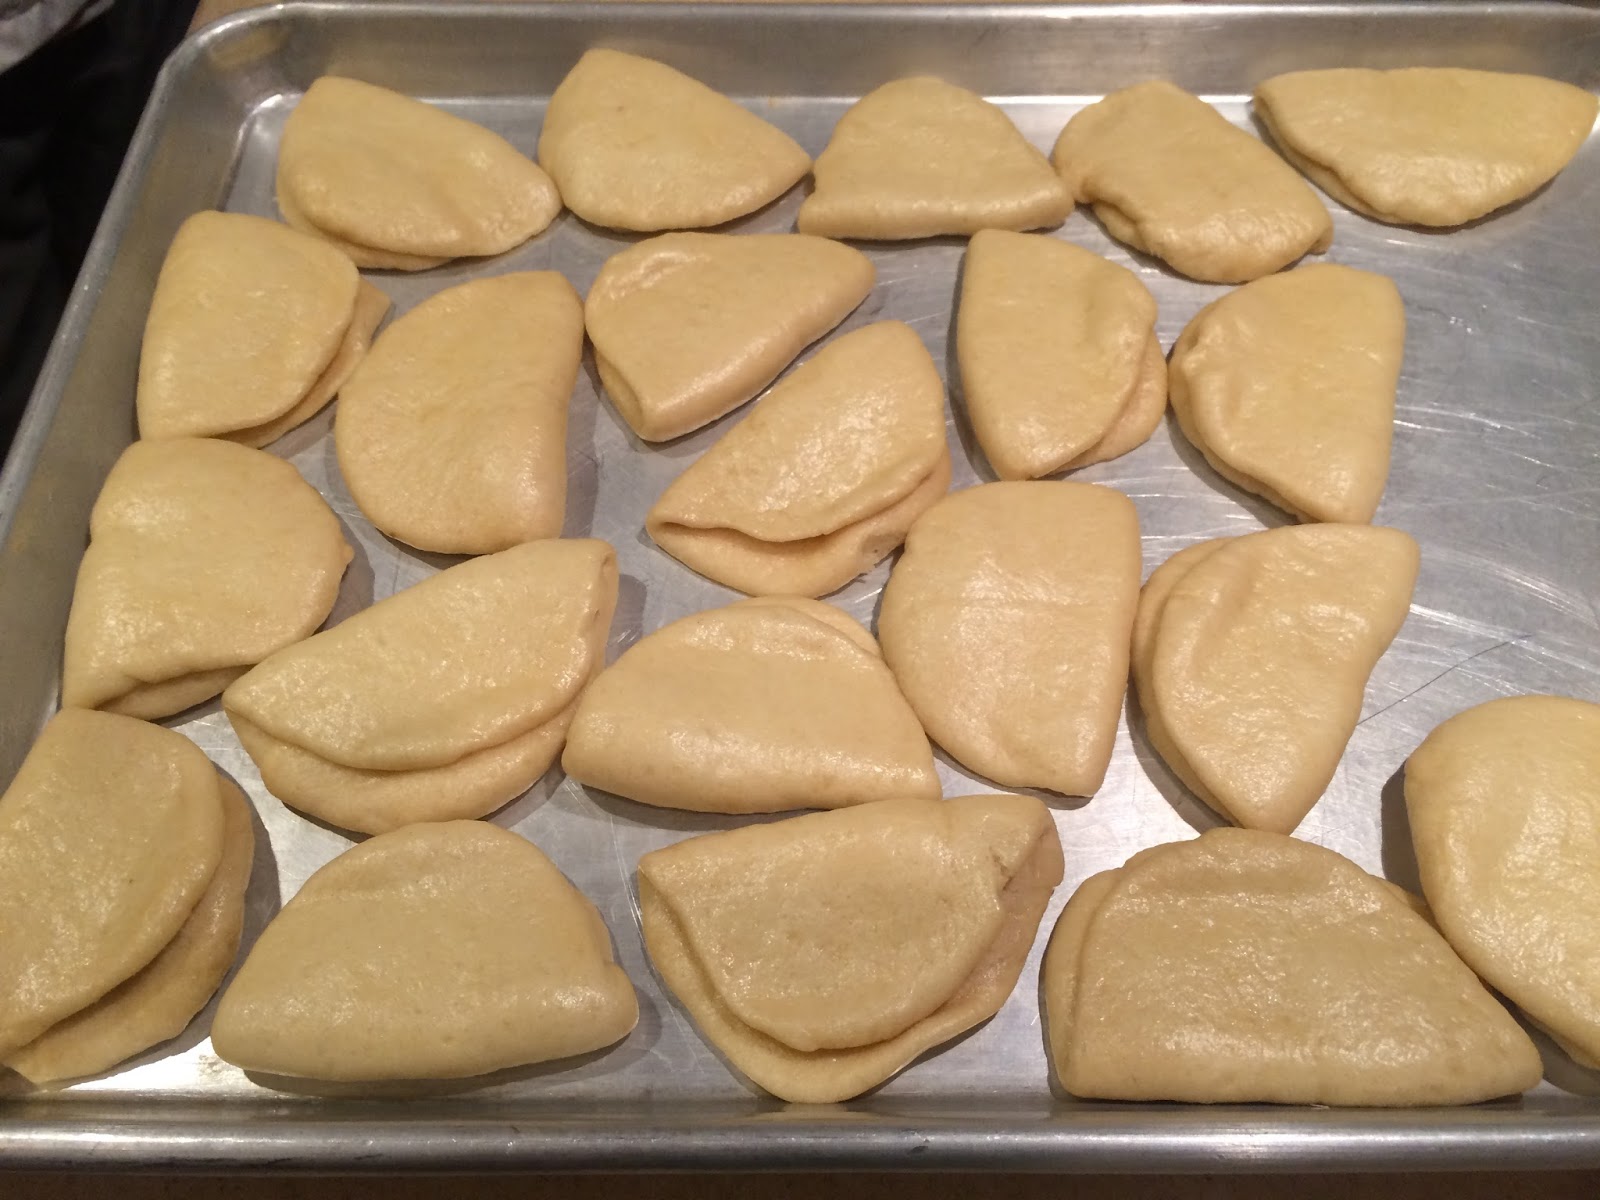
We pretty much followed the bun recipe as written, other than when it came time to roll the buns out, rather than painting the middle with plain vegetable oil, I used sesame oil for more flavor. Warning: it makes A LOT. We had 50 total before one of our cats got bored waiting for her dinner and swatted a few off the tray where they were rising to play with/attract our attention (she is DEFINITELY the cat who is willing to be naughty to get attention).

Rising

Into the steamer

Out of the steamer
For the pork belly, we tried two options: the simpler Food 52 preparation and the more complex Woks of Life preparation. Chef Spouse was not fully pleased with either one. The Food 52 texture was better, although we quickly discovered that starting it at 450 degrees was much too hot. The Woks of Life flavor was better (not surprising, considering it calls for adding more flavors to the meat). But neither developed nice cracklings. On both, the skin ended up so hard as to be totally inedible and mostly even uncuttable. So that was disappointing, because pork cracklings are DELICIOUS.

Woks of Life pork belly (sorry about the steamy-ness)

Food 52 pork belly (as I said, starting it at 450 was too hot)
We then stuffed the buns and added hoisin sauce and homemade pickles. The buns were tasty, no doubt, but I think we could up our pork belly game with a little more experimentation.


Salt and pepper squid is a favorite dim sum dish of mine. Actually, I pretty much love anything with tentacles. Unfortunately, at the fish market, I wasn't paying close enough attention, and got small octopus rather than squid. They tasted just fine, and we were able to use the same prep method, but they were a little less tender than the squid would have been.

It's a pretty simple technique: rinse, drain, chop, and marinate your tentacles (we used a combo of sesame oil and more shaoxing wine). Dredge in a combo of regular wheat flour, semolina flour, corn meal, salt, and white pepper. Deep fry. Drain. Sprinkle while hot with more salt and pepper. Stir fry with garlic, ginger, and jalapeƱos. YUM.

TENTACLES!
Then it was on to the dumplings. We'd prepared three fillings: shrimp, ground pork, and veg (well, really mushroom) to use with two techniques (shao mai and potsticker). The fillings were pretty simple: the main ingredient chopped fine, plus ginger, garlic, napa cabbage, green onion and some soy and sesame oil.

For potstickers, you fill your wrappers (not too full), seal them, sear them in as little oil as possible, then finish them with a short steam. In the first round - the shrimp - we added a little too much water to pan for the final steam, and they sort of fell apart on us. The pork and mushroom were more successful. But we did notice that the wrappers we had purchased seemed to be on the thin side.

Shrimp - see how the ones at the bottom are kind of falling apart?

Mushroom - more successful

Pork - also more successful
Yeah, that thing with the thin wrappers totally bit us in the ass for the shao mai. For shao mai, you fill your wrappers more full and gather up the sides into a little bag, leaving the top open, pack them into a single layer, and steam.
Looks good, but don't be deceived
Simple, right? Looks pretty, right?

Yeah, those thin wrappers completely stuck to each other. We ended up with a solid mass shao mai cake. A shao make, if you will.

Oops. 
Clearly, dumplings are going to require further investigation. And probably using a different brand of won ton wrappers.

To drink, Chef Spouse made us Mai Tais with his latest bar ingredient addition: velvet falernum. We also made a round of ponzu-based drinks: gimlets and last words, where we replaced half the fresh lime juice with ponzu. The last words were good, but the gimlets were outstanding. I think the green chartreuse kind of muted the ponzu, where it really shone in the simpler drink.

As Mad Kitchen Scientist pointed out, this is the second time we've been defeated by Asian cuisine (remember our disastrous attempt to make our own rice paper?), which clearly means another lab is in order.