24 April 2019

Food Lab 46: Onions (plus a guest star)

In spring, a young man's fancy may turn to thoughts of love, but your Food Labbers got thinking about onions. 

Alliums, and onions in particular, are one of the most common ingredients in savory foods of all kinds. Both Mad Kitchen Scientist and Chef Spouse have cutting boards dedicated just to alliums (because the last thing you want to do is cut up strawberries on a board that retains essence of garlic no matter how many times you wash it). Even if you're not sure what you're making for dinner, starting by mincing some garlic, dicing a shallot, or chopping up an onion is rarely going to be a waste of your time.

The thing is, we rarely pay much attention to our alliums. And there are so many varieties! Chives, garlic, scallions, spring onions, shallots, leeks, pearl onions, cipollini onions, white/yellow/red onions, sweet onions, Spanish onions, Vidalia onions, and of course, that elusive, delicious signifier of the season (and our special guest on Sunday) - ramps. 

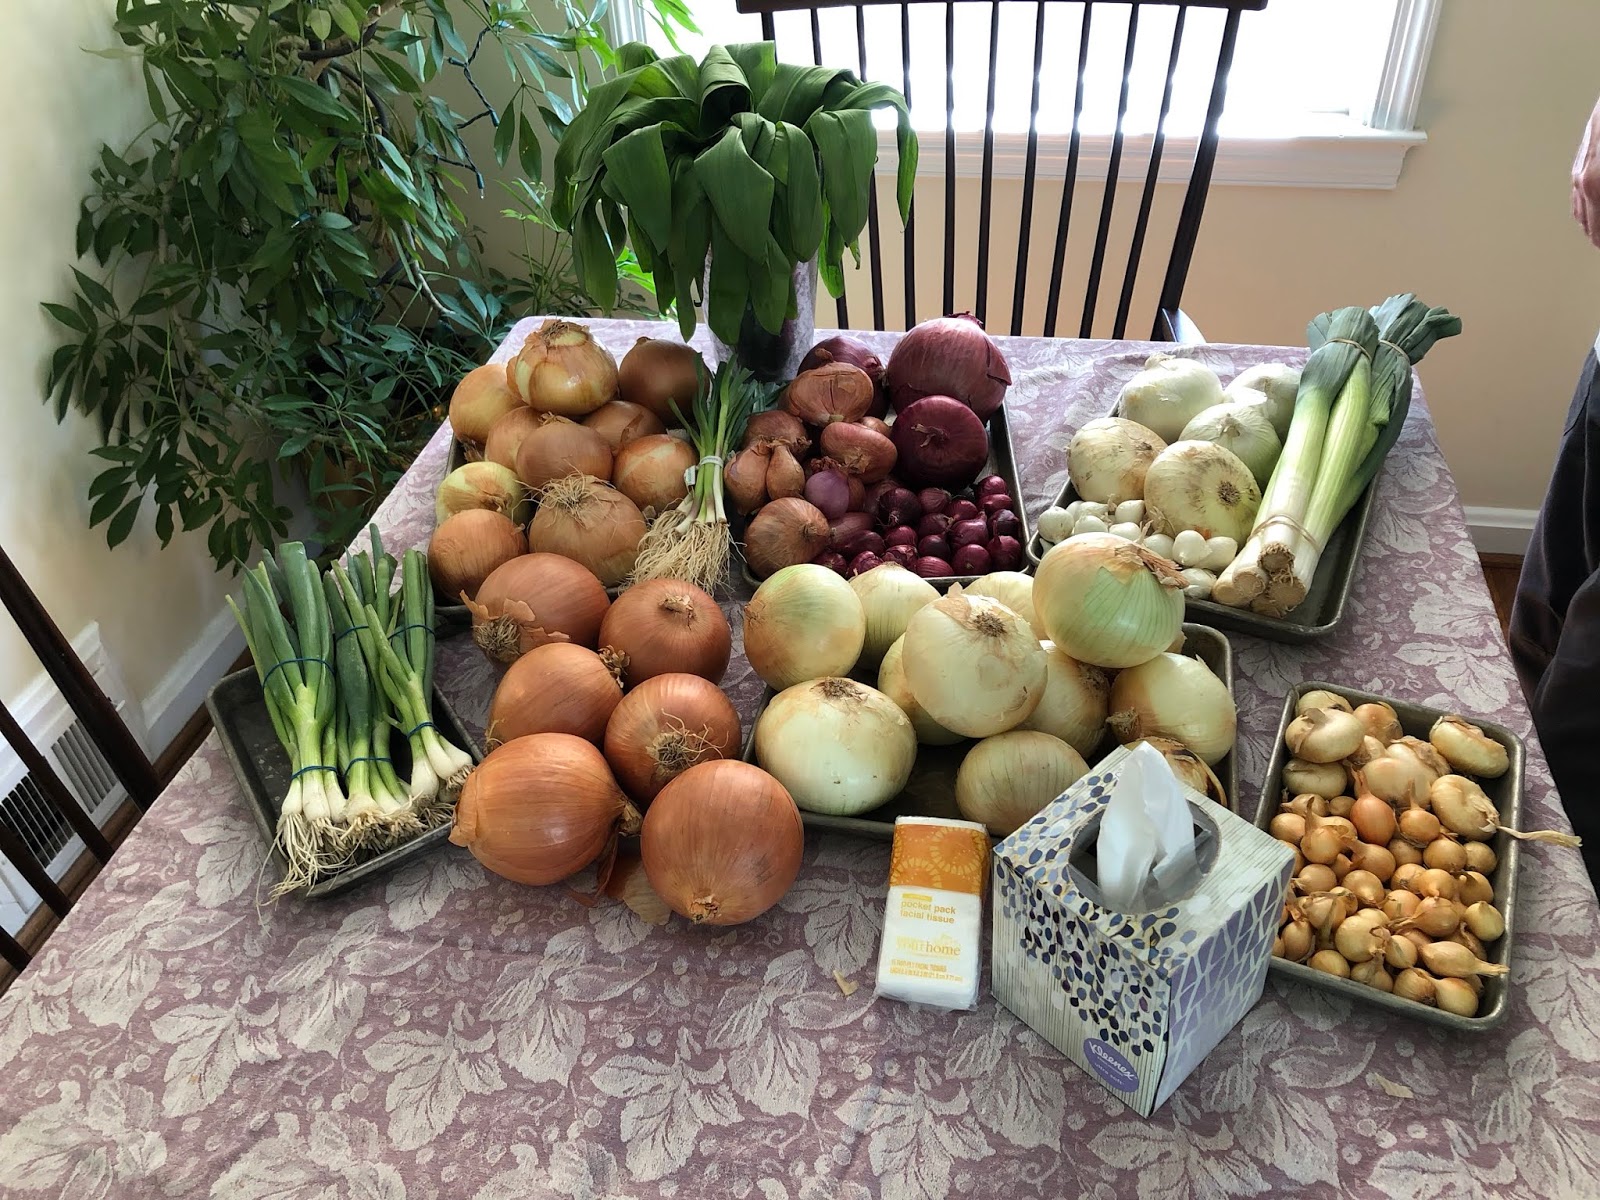
Check out the tissues - we came prepared.
Sure, there are some rough associations: scallions as a finishing element, raw - shallots for French techniques and pan sauces - garlic that features prominently in Italian and Chinese cookery. But most of us just grab a string bag of onions and a bulb of garlic in our weekly run to the grocery store and figure we're good to go for another week's worth of dinners.

So we started with testing taste: Do they taste different? Yes, that meant tasting them all raw.

That's a LOT of raw onions, son. 
Short answer: they definitely all taste different, and the Food Lab crew highly recommends you do your own taste-off, preferably with a group that's also tasting with you, so you're not the only one with dragon breath at the end.

A few tasting notes:

Ramp tops are amazing - mildly peppery like really young arugula, but more more tender, and with a freshness that screams "SPRING!" If you get your hands on ramps in the spring, the temptation is to toss them with good olive oil, salt, and pepper and lightly grill them, and I won't judge you if you do. But you might want to consider - just consider - chopping the tops into a salad and then pickling the bulbs. 

Scallions really should never be cooked.

Cipollini onions are supposed to be sweeter than regular onions. That's a lie - at least with the ones we had. The zing on the palate was wasabi-level WHOA. I believe The Executive Committee may actually have been crying for a moment. 

If you're going for raw applications, you REALLY want to look for Vidalia or sweet onions. If you can't find them, red onions will work, but the Vidalia and sweet were definitely more mild and sweet, delightfully crunchy, and almost a bit creamy.

There wasn't as much difference in taste between pearl white, yellow, and red and regular sized white, yellow, and red as I would've imagined.

We then caramelized all the main varieties separately to see if they maintained their taste differences. 

Caramelization is about slowly cooking off all the water in the onions until they're a sweet and savory brown mass of umami goodness while also avoiding generating a Maillard Reaction. So low and slow, use cast iron, and salt early (remember, you're trying to cook all the water off). Also, set aside 45 minutes - one hour. No rushing! 

You cannot IMAGINE how good the kitchen smelled
One of the surprising differences was how much water the varieties contained. We started with precisely 565 g of each type, cooked in 2 TBSP butter, and identical amounts of salt. Most varieties, when the water was cooked off, ended up around 150 g. Not the Vidalia and the red onions though - they both ended up more like 250 g. Less water in the onion --> higher yield after caramelization. 

The sweet and Vidalia onions retained their distinctive creaminess and were more mild and subtle in flavor overall after caramelization. The rest of the varieties tasted pretty similar, other than the red onions, which were both strong and sweet and retained a little more structural integrity than the other varieties - see above, RE: less water. 

So once we had an absurdity of caramelized onions, then what? 

Caramelized onions freeze really well, in your handy-dandy ice cube trays, and we did plenty of that, for later use in any and all egg applications and grilled cheese and pan sauces and finishing soups. But we needed to make something we could eat - Food Labbers cannot live by raw onions alone (for which everyone else who knows or encounters us is deeply grateful).

We opted for galettes, which are basically pizzas that you make on pastry dough, or very rustic tarts. One variety was caramelized onions, Gruyere, green garlic and ramp leaves. The other was fig spread, caramelized onions, leeks, and blue cheese.


Of course, we grilled some ramps, and The Executive Committee made a lovely spring salad of radishes, snow peas, ramp tops, and ricotta salata (she is, after all, the one who makes sure we eat our veggies).

All this is pretty standard order. You know Mad Kitchen Scientist and I couldn't leave it at that. 

What's missing? 

Dessert. 

Oh yes we did make caramelized onion ice cream - vanilla custard base, the Vidalias, and toasted pecans. It was un-fucking-believable. So very, very good. This should definitely become a food trend, and if it does, make sure you point out that we discovered it first. 

Onion ice cream. It's a thing (or should be).
What did we drink? Gin, of course, first blind-tasting Bombay Sapphire, Hendricks, The Botanist, and the FEW barrel aged gins against each other in gibsons with home-pickled pearl onions (my favorite, and still the reigning champ, is Hendricks), then Chef Spouse used some saffron gin he'd picked up for me on a whim that has turned out to be VERY difficult to mix in a light cocktail featuring Cointreau, blanco vermouth, and orange bitters.

Our gin game is strong.
We did one other test, caramelizing onions in the Dutch oven on the Green Egg. As of 8 pm, when Chef Spouse and I had to get home to feed all our beasties, they were nowhere near done. I assume they finished in time for Mad Kitchen Scientist to go to work Monday, but I haven't confirmed yet. For all I know, he's still sitting there by the Green Egg watching the onions cook down and contemplating the universe. At least the weather's been delightful the past three days. 


25 February 2019

Food Lab 45: Almond-Flour Cookies

I grew up outside of Philadelphia, in southeastern Pennsylvania. As such, I had a lot of Italian-American friends growing up. When I was in elementary school, one of my close friends came from a large Italian family that owned a local bakery. One of the first times I went over to her house, her mom made spaghetti with red gravy for dinner. When I was served, I proceeded to cut up my spaghetti into bite-sized lengths. My friend's dad took one look at my mutilated pasta, picked up my plate, scraped the sad little chunks into the trash, refilled my plate, and taught me how to eat my pasta properly, deftly twirling the long strands around the tines of my fork. Thus began my life-long love affair with Italian cuisine.

My neighborhood in DC has undergone significant transitions over the years, one of which was the loss of an outpost of Baltimore's famous Vaccaro's. When that shop shut down, I lost my local connect for cannoli, coconut macaroons, and, most distressing, amaretti.

For those who've never had them, amaretti are the MOST delicious cookie in the world. Crisp on the outside, soft in the middle, with a delicate but pronounced almond flavor and just the right level of sweetness, they cannot be beat.

I've been up in Baltimore twice in the past six months, once for business, once for fun, BOTH times in walking distance of Vaccaro's. So both times, I brought home two dozen amaretti. As I was savoring the last one, I realized: these cannot be that difficult to make. Looking up recipes confirmed it. Clearly, Food Lab: Amaretti was too small a topic.

Ah, but there is another famous cookie made with almond flour and egg whites: French macarons. Conveniently, my bestie is downsizing and recently gave me an all-macaron cookbook she'd picked up on a whim a few years ago. Now we have a worthy Food Lab topic!

The macaron concept is simple (what follows is adapted from Entertaining With Beth).

You will need the following special equipment: a highly accurate digital scale, a fine-mesh sieve, an electric mixer, a pastry bag with a plain round tip, rimless cookie sheet(s) and silpat(s)

Sift 120g very finely ground almond flour + 200g powdered sugar through a fine sieve into a bowl and set aside.


Whip the whites from three ROOM TEMPERATURE eggs until they start to foam, then add a pinch of salt, 50g of granulated sugar (that you can omit if you're finding your macarons too sweet), and 1/4 tsp cream of tartar (do NOT omit this - it's the secret ingredient to REALLY FLUFFY egg whites), and continue to whip them HARD for 8-10 minutes. You basically want the egg whites to end up the consistency of whipped cream, so you're going to need to use an electric mixer or a LOT of elbow grease - I recommend the mixer.


Combine the whipped egg white mixture with the dry ingredients mixture (I found it easier to pour the dry into the whipped eggs), stirring ~70 times with a rubber spatula, then pipe onto silpat-lined rimless cookie sheets. As Beth explains well in the link above, it's important to neither under- nor over-mix your batter. Flaws - cracked cookies, no "feet," cookies that spread out too far - are usually a result of mixing errors.

You can really pipe any size you choose. We went with piping roughly 1 inch diameter rounds, which gave us approximately 60 cookies per batch (so 30 once paired). I would think making them much smaller would be difficult, but you can certainly make them larger if you like.


Bang them on the counter hard a few times to settle any air bubbles, let them rest and set for 30-60 minutes (at which point you can pat down any little peaks you may have created in piping them out), then bake for 20 minutes at 300 degrees. The resting time is also important for the formation of their distinctive "feet." Don't short it.

Once the cookies are cool, take them off the silpat and make little sandwiches by piping on buttercream filling.

We tested the silpat versus a single-tasker macaron mat versus parchment paper. Go with the silpat. The single-tasker is now in the garbage where it belongs, and even the parchment paper sometimes didn't want to release the little buggers.

Basic buttercream: beat 1/2 stick (1/4 c.) room temperature unsalted butter, then slowly add in ~3/4 c. powdered sugar

Now, that all is going to give you a macaron, but it will be kind of dull. How do they make all those pretty colors and flavors you see at bakeries?

Well, the cookie colors are a result of adding food coloring to the eggs while you're whipping them (except in the case of chocolate cookies, which are the result of adding 10g of cocoa powder to the dry mix).

The cookie flavors (again, aside from chocolate) are a result of adding 1/2 tsp of the extract of your choice to the eggs while you're whipping them.

We chose to make vanilla (with extract), chocolate (with 10g cocoa powder), lemon (with extract and food coloring), rose (with rose flower water and food coloring), and coconut (with extract) cookies. We decorated the coconut cookies with a little sprinkle of flake coconut on top before baking (also so we could visually differentiate them from the vanilla cookies).

Chocolate, on parchment paper

Rose (color from red food coloring), on my beloved silpat

Vanilla, on the damn single-tasker, to which several of the cookies stuck
All the cookie batter came out quite consistent OTHER than the lemon. It's possible we whipped the eggs a little less, or it may have been that lemon extract includes some lemon oil. As you can see from the pictures above of the chocolate, rose, and vanilla cookies just out of the oven, the other batters were quite firm and stayed exactly where and as piped, including lumps, bumps, and ridges. The lemon, as you can see in the picture below, was definitely smoother, but it was much harder to pipe (as The Executive Committee discovered to her dismay, having drawn the "pipe" straw for that batch).


You can, of course, also flavor and color your buttercream. In fact, if you flavor your buttercream, you *should* color it so you can identify what's what.

We made the following icings:

  • Hazelnut (adding about 1/8 c. very finely ground nuts)
  • Macadamia (same)
  • Orange (adding about a tsp. of orange extract and food coloring)
  • Cherry (adding 1 oz. Ginja Licor - a Portuguese sour cherry brandy - and food coloring)
  • Coffee whiskey (adding 1 oz. bourbon and espresso powder to taste)
  • Passionfruit (adding about 2 oz. passionfruit puree and food coloring)
  • Rose (adding about 1 oz. rose flower water and food coloring)
  • Chocolate (adding about 2 tsp. cocoa powder)

(We went a little nuts)

We were able to incorporate the nut pastes and cocoa powder without having to put the buttercream back in the mixer. Any time you're trying to incorporate any sort of liquid, don't try to do it by hand - it's a pain in the ass and takes forever. Also, if you add liquid, you're going to need to add a bit more powdered sugar as well. I can't tell you how much - you just have to watch the consistency and add until it's right.

We ended up with the following combinations

  • Chocolate hazelnut
  • Chocolate orange
  • Vanilla cherry
  • Vanilla coffee whiskey
  • Rose rose
  • Rose chocolate
  • Rose cherry
  • Lemon passionfruit
  • Coconut macadamia
  • Coconut chocolate 


We ended up with a total of about 150 macarons. Which, I'll admit, is a lot. 


The universally esteemed winning combinations were:

  • Lemon passionfruit
  • Rose cherry
  • Coconut macadamia
  • Chocolate hazelnut 


You can eat them right away, but they're better if you give them a little time for the filling to meld with the cookie. Store them in the fridge to keep your buttercream firm (but remember to let them warm up before you eat them), or, if you'll be storing them for more than a few days, freeze them.

The sky is really the limit on colorings and flavorings. The cookbook my friend gave me has all sorts of options - savory varieties using ingredients like beets, carrots,  and herbs, various sorts of sweet and savory tea-infused varieties, ganache fillings, jam fillings, caramel fillings, cream cheese fillings, berry fillings, lemon curd...really, once you have the basic technique down, you're only limited by what flavor combinations you find appealing. We all realized we'd missed an opportunity for chocolate mint (either chocolate cookies with mint filling or vice versa). Next time.

What about the cookies that inspired this whole thing in the first place? Did I even make amaretti?

I did, right at the end. As I mentioned, they are dead simple to make (adapted from the recipe at Love & Olive Oil):

Combine 2 1/4 c. almond flour, 1 c. granulated sugar and 1/2 tsp salt in a bowl

Whip the whites from two ROOM TEMPERATURE eggs until they start to foam, then add a pinch of salt, 1/4 tsp. cream of tartar, and 1/2 tsp. almond extract and continue whipping the mixture to soft peak stage (4-5 minutes)

Mix the whipped egg whites into the dry ingredients with a rubber spatula. No need to be gentle - in fact, I ended up basically kneading the dough at the end.

Roll dough into 1 inch balls, roll the dough balls in powdered sugar, space about 1 inch apart on a silpat-lined cookie sheet, bake at 300 for 30-35 minutes. Makes about 2 1/2 dozen cookies.


These are really good cookies. Are they as good as Vaccaro's? No. The consistency is perfect, but I think the almond flavor needs to be stronger. The thing is, almond extract is pretty powerful stuff, so some initial caution is warranted.

All three recipes I found used 1/2 tsp. of almond extract, but one recipe used that for 3 1/2 c. almond flour, and the other used it for 1 c. almond flour, so I chose the midpoint of the three. And since we'd already made FIVE full batches of macaron batter and had to go back to the store TWICE for more powdered sugar, and I used the last of the almond flour for the one batch of amaretti I made, I wasn't about to put the rest of the crew through multiple rounds of amaretti as well. Also by this point, it was after 8 pm, we hadn't had dinner yet, and everyone was starting to get cranky.

Other options I've seen that I'll try in future test runs include:

1. Add the zest of one lemon to the dry ingredients (which I would think might enhance the almondyness of the almond extract)

2. Increase the almond extract to 1 tsp.

3. Keep the almond extract at 1/2 tsp. but also add 1/2 tsp. of Amaretto liqueur (this is probably where I'll start)

4. Use *bitter* almond extract (if you can find it)

Regardless, it looks like I'll be adding a new pantry staple: almond flour.