29 December 2011

News & Notes

First, if you haven't seen the "The 10 Types of Foodies" slideshow on the HuffPo, get over there immediately. It's hilarious. Your intrepid Food Labbers definitely fall in the "Made It Myself!" and "DIY" categories. Where do you fall?

Second, when's the next lab? We'll be doing a mini-lab this weekend of pate a choux at Mad Kitchen Scientist and The Executive Committee's New Year's Eve party. Gougeres for everyone!

We did have a full Lab planned for December 18, but due to some schedule conflicts, it had to be postponed until after the New Year. Topic? Well, here's a hint: it's a "part 2" of an earlier lab, and it's apropos we'll be doing it during football season (well, OK, post-season).

I've done a few more rounds of homemade croissants since our butter dough lab of last fall, always sticking with Julia's recipe from MtAoFC. This last time, I tried my first shot at chocolate-filled. Rather than trying to get the chocolate to stay in the traditional crescent shaped rolls, I went with rectangles, so I could seal them securely. They were good, particularly when they were still warm, but they needed *more* chocolate inside. Next time. That's them in the photo.

Chef Spouse's dad sent him the first Cook's Illustrated cookbook for Christmas (I'd already gotten him The New Best Recipe cookbook), and it has a different take on croissants that I'm looking forward to trying soon. Definitely need to do it while we still have some of the Julia recipe croissants in the freezer for taste testing.

Speaking of Chef Spouse, one of the gifts he gave me this year was 12 coupons for "Honey, I'd like you to try this recipe...". He's been feeling a little bored with his cooking, so be on the lookout for some hijinks.

Also speaking of Chef Spouse, I have a rule about New Year's resolutions that they have to be something fun. He's enjoyed tagging along on some of them (trapeze lessons, getting our motorcycle licenses, sky diving, etc.), but he's never done it himself. This year, he's joining the party. His resolution? To take a serious cooking class, potentially one of the CIA boot camps or something at L'Academie de Cuisine (which has the advantage of being local). Assuming he goes through with it, I'm going to MAKE him write about it for this blog, because that would be too awesome not to document.

15 November 2011

Food Lab 12: Rice

Chef Spouse has a love/hate relationship with rice. Well, since he got serious about cooking, it's actually mostly been a hate/hate relationship. It always seems to come out sticky. Like clumpy sticky.

Ouch.

So we decided, once and for all, to figure out how to get it right.

Before you even start with me, yes, I know: "rice cooker." But Chef Spouse is of the "no single taskers!" school of though, so no rice cooker. Also, even though when we renovated the kitchen, we got a LOT more cabinet space, it's not infinite. And we don't really make rice often enough to make it worthwhile to devote the space to that as opposed to, say, a food mill.


Despite what you might think from the lovely picture above, we stuck with basmati rice the entire time for quality control.

The basic variables are:

Rinsed versus unrinsed
Soaked versus unsoaked
Boiled versus steamed versus baked

The first test we did was rinsed then soaked versus unrinsed then soaked. By "rinse," I mean you rinse and swirl and drain until the water runs clean. Both were then drained and cooked in the traditional manner: bring rice and water (in a 1:1.5 ratio) to boil, then lower heat and simmer under water's pretty much gone (~8 minutes for pre-soaked white rice), then remove from heat, covered, and steam for ~10 minutes. Unsurprisingly, there wasn't much difference between rinsed versus unrinsed when you were then going to soak and drain.

For the second test, we rinsed them both, then tested the boiled in lots of water (like pasta would be) versus the traditional cooking method described above. The pasta style was softer and fluffier, while the traditional cooking method was more al dente. Strong preferences started to emerge.

For the third test, we did everything wrong - no rinsing, stirring constantly, no rest. That rice was not good, and didn't cook the whole way through. We used it later to make Persian rice (which is basically rice that's partially cooked, drained, and then finished by being poached in butter. Yeah, it was pretty damn good.)

For the fourth test, we did the Commander's Palace method - it's a parboil, at a 1:4 ratio, for ~12 minutes, then you drain it, bung in butter and bake it at 325 for ~5 minutes. It's good, for sure (BUTTER!), but would probably be best for a situation in which the oven's already on.

For the fifth test, we tried a risotto style method, where you saute your rice in fat first (BUTTER!), then do the traditional 1:1.5 boil/simmer/steam method. This one also came out a true al dente, with a nice chewy center.

Of course, we also ran a test with the Mad Kitchen Scientist's rice cooker.  It came out quite light and fluffy - similar to the pasta-style rice.

So what did we learn?

Rinsing is critical. No matter what method you use, you MUST rinse your rice first.

Resting/steaming at the end to finish the cooking is also critical. Well, at least when you do the boil/simmer/steam method of cooking.

Soaking is good, if you remember/have time for it. If you rinse your rice and put it on to soak as you start your dinner prep, you should be golden, particularly since pre-soaked rice will cook more quickly.

Pasta-style is great if you need to make a LOT of rice, because it's more forgiving on technique and time, and you don't have to worry about the bottom grains burning to the pot before the top grains are cooked through.

And yes, a rice cooker is also great, if you have space for one and aren't ethically opposed to single-taskers.

So of course, with all that leftover rice, we made rice pudding.

Actually, the funny part is, only one of the recipes we chose used already-cooked rice. So we cooked yet more rice for two of the three rice puddings we made. Food Lab, thy name is excess.

So we did a custard style that started with cooking rice in milk on the stovetop and then ended with the custard topping dumped on top going into the oven. That resulted in a rice pudding bottom with a flan-like top. Good. Not amazing. Would be better as rice pudding and flan, two separate desserts.

We also used leftover rice to make an entirely stovetop version. That was quite good, very easy, and what is going to happen to all my leftover takeout Chinese rice from now on.

And then there was the version that started with uncooked arborio rice and went straight into the oven. A few caveats: take the advice of the commenters and stir it every 15 minutes to prevent a skin from forming in the first place. It will take about an extra 15 minutes to cook in the ramekins (probably longer if you do it all in one container). Add vanilla when you add the heavy cream at the end.


All that said: IT WAS F-ING AMAZING.

O.M.G.

Best rice pudding ever.

EVER.

Not kidding.

26 October 2011

Food Lab 11: Corn Tortillas

Chef Spouse and I are both passionate about food and drink, but we're also passionate about the NFL. So every year, we have a big Super Bowl party. And Chef Spouse has a dream. His dream is for everything we cook for the Super Bowl party to be made from scratch. We usually do Tex-Mex, not least of which because it's easy to make for a large but indeterminately sized crowd, and while I don't think he's going to try to make tequila in the basement (as far as I know), he did want to learn how to make tortillas.

We were originally planning to make both corn and flour tortillas, but we got side-tracked (beer-tracked? thanks for the awesome homebrew, Mad Kitchen Scientist!) and only got to corn.

Turns out, corn tortillas are REALLY easy to make.

Because corn flour, aka masa, develops no gluten, you can screw around with the dough as much as you need to with no ill effect. And it doesn't need to rise or rest or anything - it takes longer to heat the pan that it does to make the tortillas.


To wit: the first batch of dough I made was, we discovered after pressing a few tortillas, too dry. So I dumped it back into the bowl, added a bit more water, mixed some more, rolled some more dough balls, and Chef Spouse pressed them. And they cooked and tasted just fine.


So what we discovered is that we wanted about equal amounts of masa and water, rather than the 4/3 ratio we had found online.

Traditional corn tortillas are literally just masa and water. We also discovered that a little sprinkle of salt after pressing was nice.

You do definitely want a tortilla press - rolling them with a pin was a pain in the ass, and resulted in very thick tortillas. And then you just cook them in a hot, dry cast iron skillet. Once cooked, we popped them on a cookie sheet covered by a tea towel to retain some heat and moisture, and that was it.

What did we eat on them? Mad Kitchen Scientist had prepared mole pork and refried beans, and Chef Spouse and I made a bunch of salsas - fresh mango and kiwi with fresh chiles, roasted tomatillo and roasted chiles, roasted pineapple and fresh and roasted chiles, and roasted tomato with roasted chiles. I can't really say with 100% certainty what was in any of them, since we just had bowls of ingredients and added everything to taste. But I can say that the bowls contained roasted tomatillos; roasted japalenos, habaneros, and serranos; fresh jalapenos, garlic, shallots, cilantro, and salt & pepper.


Now, I don't know if Chef Spouse is really going to make a zillion fresh corn tortillas and deep fry them all up for the chips for the Super Bowl party, but it's nice to know we could if we wanted to.

02 August 2011

Food Lab 10: Sausage

Told you we weren't out of business.

In what has become a continuing theme for us, we went for excess: 9 1/2 pounds of pork shoulder, 2 1/2 pounds of uncured pork belly. For those who are bad at math, that's TWELVE pounds of meat to grind, season, and stuff into casings.

One thing we realized immediately: sausage making brings out your inner 12 year old. Yes, it's all kind of gross and lends itself to lots of adolescent jokes about sex. I even pulled out "that's what she said" at one point, and I NEVER make "that's what she said" jokes. NEVER.

Another thing we realized nearly immediately: as Mad Kitchen Scientist observed, "This is a process that lends itself to industrialization." The grinding, mixing and spicing was FAST. The stuffing was S-L-O-W. No wonder sausages are made in factories.

 We chose 3 basic sausage recipes:
  1. The herbed breakfast sausage from Lets Make Sausage.
  2. Chef Donald Link's spicy sausage recipe from Real Cajun.
  3. The andouille recipe from The Spicy Sausage.
A few notes on making sausage: one, the recipes all make HUGE batches. We cut everything at least in half. Two, we thought none of them seemed seasoned enough, so after cutting the meat in half or more, we kept all the other spicing as the original full recipe called for, other than the salt - we reduced the salt accordingly.

For grinding, we did a rough chop on everything (like 2 inches x 2 inches), then fed it through the KitchenAid meat grinder.


The mixing of ingredients happened fast. All the sausage recipes recommend mixing with your hands, and they're right - you need to feel the distribution of your herbs and spices throughout the meat. We followed the first two recipes pretty closely, although, as often happens with Food Lab, things started to spin out of control by the third sausage, so we got a little creative with the andouille recipe. Fresh hot peppers and cloves both made an unexpected appearance. The spinning out of control may have been related to the excellent home brew Mad Kitchen Scientist supplied - a porter, a steam ale, and an accidental summer lager that was FANTASTIC.


Julia and McGee both recommend a 2 to 1 ratio of meat to fat. Most of the recipes we found online called for no additional fat. That just seemed wrong to us, so we sought a middle way, spreading the 2 1/2 pounds of pork belly across the 9 1/2 pounds of shoulder.

Anywho, the thing that really takes the time is the stuffing. The guy who runs Let's Make Sausage seems to have some sort of press that apparently makes the stuffing process go quickly. The KitchenAid stuffing attachment works fine, but it takes FOREVER. It takes to long that Chef Spouse uttered the unthinkable: if we start making a lot of homemade sausage, we're getting that uni-tasker sausage press. What would Alton Brown say?!?!?

Even though we had snacks, we wanted to try the sausage, so we did do a little cooking and tasting of patty sausage. We quickly learned that the patty sausage is not nearly as good as the sausage in casings. My theory is that sausage in casings basically cooks by poaching in its own fat, while the fat in patty sausage cooks out. I could be wrong. But I don't think so.

Another thing we learned? The casings smell BAD. It was the pig's GI tract. It smells like it was the pig's GI tract.

I thought the best sausage was Donald Link's spicy sausage. Chef Spouse and The Executive Committee preferred the herbed sausage. Mad Kitchen Scientist was reserving judgement until he had the chance to smoke some of the andouille.


So how much did it make? FIFTY 6-8 inch sausages. The IAs couldn't make it - the Spawn was having a bad day - and I've already promised them some of the haul. Yes, it made THAT MUCH sausage.

[Insert naughty sausage joke here.]

07 July 2011

Four Questions

When's the next Food Lab?

We were going to do it over the holiday weekend, but illness and schedules intervened, so we're now re-scheduled for Sunday, July 31.  The re-schedule means that we might have a special guest chef join us. Who? You'll just have to wait to find out.

What will you be labbing?

Well, I don't like to give these away in advance, but I can say that it required Chef Spouse to purchase another attachment for the Kitchen Aid mixer AND we have the following accompaniments planned: home brew from Mad Kitchen Scientist, various slaws from Mama IA, and I'll be making the hot pretzels from Food Lab: Boiled Doughs again. That should give you a good clue as to what's on tap.

Are you doing a CSA again this summer?

I am, although it wasn't nearly as much of a challenge as I anticipated last year, so I've opted against blogging about it again. But rest assured I'm still getting weekly deliveries of delicious (mostly) organic produce from our friends at Shallowbrook Farm. So far, I've enjoyed summer squash and Boston bibb lettuce pretty much every week, plus red cabbage, broccoli, cauliflower, sugar peas, green beans, Swiss chard, scallions, onions, red potatoes, turnips, rutabagas, beets, green peppers, corn on the cob, strawberries, and blackberries some weeks, plus this week, I got my very first peaches of the season. PEACHES!

Any other exciting food news going on?

Chef Spouse and I have been trying to get out once a week to enjoy all the new restaurants that are popping up in our newly hip neighborhood. Favorites so far include the Atlas Room and Smith Commons, joining old favorites Ethiopic, Granville Moore's, the recently renovated Argonaut, and H Street Country Club. Eat local!

Chef Spouse has perfected his chicken and andouille gumbo recipe - now we're on to experimenting with duck gumbo. Can mastering Prejean's pheasant-duck-andouille gumbo be far behind?

We've been playing around with flavored simple syrups for cocktails - so far, the ginger is the biggest hit.

The grape vines we planted a few years ago (gift from my pops) are LOADED with grapes. We'll see if any survive the annual summer bird onslaught.

Chef Spouse is also working on learning how to properly cook fish this summer. He never liked fish growing up (a real shame for a boy from Cape Cod), but he's realizing it was because it was mostly poor quality and poorly prepared. We can afford good fish, and we're both good cooks, so he's decided it's time to conquer his fear/distaste. Score! (since I love fish)

We've been continuing to enjoy the deep fryer my parents got us for Christmas last year, although we never have gotten around to trying fried Snickers bars again. But I'm kicking some beignet ass, and we continue to enjoy properly made French fries at home from time to time.

We planted a second large pot of Kentucky Colonel mint for juleps this summer, and, predictably, we're now completely overwhelmed with mint. Hmmm - speaking of flavored simple syrups.


So what's new with you?

01 June 2011

Food Lab 9a: More -aise-iness

The return of the leftover egg whites . . .

Yes, even with egg-white cocktails, Aise-lab left a surplus of egg whites, but oddly no butter leftovers . . . hmmm.

So as is often the way with food lab, the goodness keeps on coming. In this case, an orange angel cake for the Executive Committee's birthday! Following Joy to a T -- and happily noting that Joy's recipes calls for one-and-a-half cups of egg whites (easily measured) rather than X egg whites (impossible, given the chaotic accretion of egg whites during Aise-lab) -- a light, fluffy temptation is ready to go into the oven:


31 May 2011

Food Lab 9: -aises

As in:

Holland-aise
Bearn-aise
Mayonn-aise

Etc.

When you're going classic, go classic. Our texts for the day? Julia and McGee of course.

According to McGee, there are 5 basic types of Hollandaise:
  1. Careme – cook egg yolks and water based ingredients – whisk in pats of whole butter
  2. Escoffier - warm eggs yolks and water based ingredients – whisk in melted or clarified butter
  3. Simple - bung all ingredients into a cold saucepan – heat on low – stir constantly
  4. Mayonnaise - warm egg yolks and water based ingredients – whisk in clarified butter
  5. Sabayon – whisk egg yolks with water to form a foam – whisk in butter and lemon
How much butter? For that we go to Julia. She says 2 sticks - a full cup - for 3 yolks, but we felt that *might* be a little excessive. We ended up with about 3/4 c. per batch.

What do I mean by "water-based ingredients"? Non-oil-based. Generally a Tbsp of water and a Tbsp of some acid (we mostly used lemon juice).

I could recount it all, but here's the short of it (I was going to write "skinny" but do you have any idea how much butter we ate Sunday?):
  • Use a glass bowl for your double boiler.
  • Forget the clarified butter - it scrambles your yolks. Use pats of cold butter. Which also cuts down on steps.
  • Do not use an immersion blender. You'll end up with mayonnaise. Which is excellent, but not what we're after.
  • You MUST beat the sauce until sticky before adding the butter if you want a nice thick Hollandaise.


When the sauce broke - aka, the clarified butter attempt (and no, metal versus glass bowls didn't make a bit of difference), the McGee method of fixing it did work, at least for a while. Strain the broken sauce to get the solids out, then start with another egg yolk and a Tbsp of water, whisk that, then whisk in the broken sauce. It eventually broke again, but it took about an hour.

The big difference with Bearnaise is that rather than just using lemon juice for your liquid, you use a reduction. The traditional reduction is white wine, white wine vinegar, tarragon and shallots. But we invented something WAY better: deglaise.

What is Deglaise?

You start by preparing scaloppini beef like we did in deglazing lab. Then you prepare a pan sauce, also from deglazing lab.  Then you use THAT for your wine/vinegar reduction part of Bearnaise. Mad Kitchen Scientist actually asked Chef Spouse to marry him after the delivery of this sauce to the table.

We did also do a Maltaise, which is Hollandaise with orange juice and orange zest added. THAT was an application for the immersion blender, as the added liquid thinned out the sauce considerably. It was delicious, though.

Mad Kitchen Scientist then whipped up a bunch of mayonnaises. Clearly I should've paid more attention, because when I tried to make it tonight to bind our crabcakes, it did not go well. I thought "1 egg yolk, a little vinegar, salt and pepper, then oil until it looks right" seemed clear enough, but apparently not. He did one version using walnut oil, which we decided would be divine on a waldorf salad, and another using sesame oil. It was a little strong initially, but with the addition of some peanut oil and some sriracha was quite nice.


Mama IA made a lemon meringue pie, too, which I heard was fantastic, but I was MUCH too full to partake, not least of which because she made a LOT of meringue, which we turned into a lemon meringue drink with vodka, limoncello, simple syrup and lemon juice.

I leave you with one thought (which was the quote of the day):
"Butter before booze."

28 March 2011

Food Lab 8: Duck

There was a man. A man who loved to cook. This man had a dream. His dream involved poultry. And animal fat. For many long years he dreamed. And cooked. And stored animal fat. And sought fellow travelers, people who could understand, nay, share in his dream.

One cold, slightly snowy March Sunday, it all came together.

The man.

The plan.

The team.

The animal fat.


And Food Lab: Duck was born.

Sadly, the IAs were unable to join us. but Mad Kitchen Scientist and The Executive Committee had right-minded friends in for the weekend, so we still had a full compliment of 6.

Our mission? Duck confit.

Confit as a technique arose as a way of preserving duck. According to many recipes, a batch of duck confit well covered with fat and sealed in a glass jar or stoneware crock can keep in the refrigerator for up to 6 months.

Ours didn't make it quite that long.

Of course, we had to start with drinks. Since blood oranges are in season, we went with a variety of blood orange cocktails: a blood orange margarita, a blood orange Negroni and a blood orange French 75. All quite tasty.


We had 3 full ducks, plus an additional 6 legs. We had planned to cook the legs and wings entirely in duck fat, but Chef Spouse just grabbed the bag of fat cubes that was on top. Not duck fat - bacon fat. Which turned out just fine.

So while Chef Spouse mixed the cocktails, we dumped the bacon fat and the big ass bag of duck fat into a large pot and started it warming while the Mad Kitchen Scientist butchered the three whole ducks, reserving the livers and hearts.


Confit is surprisingly simple to execute: you salt down (and season if you like) your duck parts while your vat o' animal fat comes up to temperature (275). Then you rinse and dry your duck parts, submerge them in the fat, and cook for about 1 1/2 - 2 hours. Then you remove the parts from the fat, remove the cooked meat from the bones, and enjoy the tasty deliciousness.


The other cool thing is that at the end of the process, you actually have MORE fat than you started with, because some renders out of the legs while you're poaching them in fat, thus encouraging you to make even MORE confit. Not that this crowd will need much convincing.

Quick note: this is a LOT of animal fat. You will need to be able to wipe up spills. Two words for you: shop towels. Much more effective than paper towels.

While our duck legs were taking their warm fat bath, we had other duck parts to play with.

Like those reserved livers and hearts, aka pate. We started by sauteing the livers and hearts in duck fat with minced shallots and garlic. We also reconstituted some "Chinese black fungus" - yes, that's really what it was called. No, I can't be more specific. In round 1, we stuck with the basic: bread crumbs, salt and some chiffonade fresh sage leaves from plants I'd trimmed back that morning. We blitzed it up in the food processor and popped it into a crock in the fridge.

But you know us: we can never leave well enough alone. So with the second half of sauteed innards, we added tarragon, blood orange zest, and some dates. Verdict? The second batch, a little more complex and sweeter, was better.

Chef Spouse also wanted to perfect his method for searing duck breasts. If not done properly, the fat can get gummy or rubbery. He tried high heat the whole time, starting low and going high, starting high and going low, and the winner: high heat the whole time, but flipping the duck breast onto an extra slab of duck fat so there was always fat between the meat and the pan. Of course, it did manage to smoke up three rooms and set off the smoke detector. But it was totes worth it.


The other thing to remember is that the USDA recommends cooking duck to 160 degrees. Do that, and you'll end up with duck-flavored shoe leather. Take the duck off the heat when it hits 120 degrees, let it rest to about 130-135, and eat it. Live dangerously.

But we still had more parts, although at this point things start getting a little fuzzy for me. Hey, we'd had a fair amount of wine. We went on to tea-smoke some curried duck legs. And roast the 3 carcasses plus 2 more Chef Spouse and I brought along to make duck stock. And we deep fry cracklins on the stove top in more duck fat: black pepper versus white pepper versus five spice powder, which was the best of the three.

As the out of towners observed: we were all on the quacklins diet.

Thank goodness I had my annual cholesterol screening done back in January. By next January, I might be back to a reasonable level.

22 February 2011

Food Lab 7: Boiled Doughs

Food labbing during football season didn't work quite as well as we'd hoped, but the season's over now, so it's time to get back to experiments with food!

First up: boiled doughs, aka bagels (and pretzels).

So one of the things that's interesting about boiled doughs is that the boiling process basically super-charges the second rise. Which is a good thing, since immersion in boiling water also kills the yeast.

We decided to do two takes on bagels:

1. Based on the recipe in Mark Bittman's How to Cook Everything.

2. Based on a recipe from Emeril Lagasse.

The Bittman recipe was a long rise recipe, so we went with pumpernickel flour (4 parts to 2 parts whole wheat pastry flour and 2 parts bread flour, all King Arthur) and SAF red label yeast. Initial rise there was about two hours.


The Lagasse recipe was a short rise recipe, so we went with Fleischmann's yeast (which is faster-acting) with equal parts whole wheat pastry flour and bread flour. We also substituted barley malt syrup for the sugar, since we had it on hand for the pumpernickel bagels, but you could also use honey or a honey/molasses combo. Its initial rise was about an hour.

(The sugar, of course, helps activate the yeast by giving it something to feed on, and using something other than plain granulated sugar adds some subtle flavors and a little moisture.)

In the meantime, we also mixed up a soft pretzel dough. I can't remember where I got the recipe (although I do promise to reproduce it in another post), but I do remember that I found it while looking for a replacement for the recipe in the CIA baking book, which calls for barley malt syrup (which I didn't have on hand at the time) and...boiling in a lye solution. Not gonna happen. (Although Mama IA is agitating for a liquid nitrogen lab, so perhaps Dangerous Kitchen Ingredients Lab is in my future.)


Pretzels are nice because they're super fast - first rise is 45 minutes, you form the pretzels, second rise is 20 minutes, you boil them, then bake for 20 minutes. From "let me collect my ingredients" to "break out the mustard!" it takes less than 2 hours.


Most recipes for bagels advise dividing your risen, punched down, and re-kneaded dough into 8 (or 10 or 12) pieces, rolling them into logs and then pinching the ends together. That seemed a little silly to us. We formed our bagels by making dough balls, then poking a hole through the middle, and swirling them around on a finger to form a dough ring.

Then it was time for the second rise, about 30 minutes for each set.

Quick pop into a kettle of boiling water - about a minute per side - then baking for about 30 minutes in a 425 degree oven.

Observations: these are nice normal sized bagels, not GIANT bagels, thank goodness. And they taste great, particularly the pumpernickel variety. But they came out sort of flat. I think in retrospect, I'd definitely let the second rise go longer, and possibly the first rise, too. I think the whole wheat pastry flour might be the culprit, as the texture was nice, but we didn't get a strong rise. Perhaps a little more kneading time would be of benefit, too. Also, we had the kitchen door open (you'll see why below), so it might have been a little chilly for dough.


So why was the kitchen door open? Because what goes with bagels better than smoked fish?

Specifically, smoked rainbow trout and smoked salmon.

Chef Spouse and I stopped at Eastern Market on our way to the IAs' pad and bought two beautiful whole boned but head and skin on trout, and a gorgeous piece of wild Alaskan king salmon fillet.


We were going to attempt an outdoor smoking in the IAs' outdoor fire pit, but it was a code red day for fires around here (high winds), so we used The Mad Kitchen Scientist's indoor smoking method:

Line a large saute pan with a tight-fitting lid with foil.

Cover the foil with a thin layer of rice and sugar (aka, "stuff that will burn").

Set a circular rack on some foil ball spacers.


Season your fish as you like, pop it on the rack, and cover with that tight-fitting lid.

Heat the pan on high until it starts smoking (that tight-fitting lid won't completely contain the smoke, which is why the door was open), and leave on the fire for about 25 minutes.

Then turn the burner off and let the pan sit, tightly covered, for about another 20-30 minutes, at which point lifting the lid hopefully will not set off your smoke alarm.

This was delicious and SUPER easy.


Accompanying drink? Manhattans of course. (Get it? Bagels? Manhattans? I kill me!) We all fell in love with Redemption Rye (a recent acquisition) and Fee Brothers bitters, although I remained firmly in my traditional whiskey barrel bitters camp, while Mad Kitchen Scientist definitely preferred the rhubarb. Chef Spouse is a Peychaud's man. Regardless, if you've been mixing cocktails without bitters, shame on you. They add a level of complexity that's impossible to achieve any other way. And they're dirt cheap - a bottle will run you about $6 and probably last you at least a year. You have NO excuse! Go get some!

One of the frequent side effects of food lab is that I discover new kitchen tools I MUST have. This one showed me four:
  1. A circular rack for my largest saute pan so I can stovetop smoke my own fish.
  2. A Danish dough whisk. LOVE! Makes starting a yeast dough MUCH easier than using a spoon.
  3. A SodaStream. Do you have ANY idea how much club soda we go through during mint julep season?
  4. An Appalachian kneading bowl. The Mad Kitchen Scientist has a gorgeous hand-carved specimen he acquired while in Blacksburg, VA that I attempted to steal. Sadly, he noticed. So now I have to figure out where to get one. Any ideas?

21 February 2011

Experiments in King Cake: Take 3

OK, THIS is the one.

I think.

Feedback from Chef Spouse and the office has been very positive. I did a HALF recipe this time so it wasn't so giant, and went a little lighter on the liquids and a little heavier on the eggs.

So here we go:


Times-Picayune/Bain Family King Cake 
(as interpreted by me)

3/4 lb. all purpose flour
1/2 oz. yeast
3/4 c. lukewarm water
1/2 c. lukewarm milk

Combine them all in a big bowl and mix - and it will be mixing rather than kneading, because this is a very loose dough. Once it's all blended, cover the bowl and let rise in a warm spot for about 2 hours.

1/2 lb. unsalted butter
4 eggs
1/2 c. sugar

Use a mixer to beat them all together in a LARGE bowl. I've been just dumping them all in together, but I also want to try beating the butter and sugar first, then adding the eggs. Next time.

So why a LARGE bowl? Because...


1-2 c. flour
1 tsp. salt

Combine the risen dough, the butter/sugar/egg mixture, and 1 tsp. salt in the LARGE bowl. Start with 1/2 c. of flour and add it 1/2 c. at a time until everything's incorporated and you once again have a loose dough. I know I just switched from weight to volume with the flour, but it's hard to eyeball weight.

Confession time: I used the Kitchen Aid with the dough hook for this round. The dough is so sticky it's really hard to work by hand. And the dough hook did great - you just have to stop it periodically and scrape the dough off, otherwise it just spins in the center of the egg/butter/sugar mixture and the two never combine.

OK, on to the next rise, which should take about an hour.

While waiting, empty a can of mandarin oranges, peel off the label, and wash the can. Fill the can with clean rocks and lightly grease the outside. Also grease a 12" springform pan.

Once the dough is risen, dump it into your springform pan and make a hole in the center. Stick the mandarin orange can of rocks into the hole.

One more rise, again about an hour.

Heat your oven to 360 degrees (335 if convection), and bake the cake until it reaches an internal temperature of 200 degrees, which should take about 40 minutes (but start checking it at 30 minutes).

While it's cooling, make your icing:

1 c. 10x powdered sugar
1/8 c. sweetened condensed milk
1/4 tsp. almond extract
a little water

Whisk together the powdered sugar, the sweetened condensed milk and the almond extract, and add just enough water to allow you to drizzle the icing but not so much that it's runny (or it will run right off the cake). We're talking less than 1/8 c. water. Not much.

Once the cake is cooled, drizzle the icing on and decorate with your purple, green and yellow icing.


Laissez les bons temps rouler!

\

16 February 2011

Experiments in King Cake: Take 2

Take 2: Bossman's family secret recipe. Well, actually, it's not that secret, but they're krewe members, and the recipe dates to 1901, so it's pretty authentic. (Since they are also long-time Garden District residents, I'm guessing maybe Rex or Comus.)

Did I mention the recipe is old? It's also hilariously vague. 

Problem #1: the recipe provides no clue whatsoever about how much liquid to use. Well, OK, not no clue. I quote: "Make a dough that is neither too stiff or too soft."

OOOOOOOO-kay.

Fortunately, Bossman had shared a key piece of information: it's "brioche-like."

Brioche! I can work with that! To the cookbooks, Batman!

A little investigation revealed that brioche recipes generally call for about a cup of liquid per 8 oz. (by weight) of flour. Of course, I'm also going to be adding between 6 and 12 eggs (yes, the recipe really says 6-12, which is not s subtle difference), so I need to account for that. And...

Problem #2: the 1 cup of sugar/6-12 eggs/1 lb. of butter combo doesn't get added to the dough until after the first rising. It occurred to me that if the dough were actually a dough at that point, there would be little chance that would happen successfully. Hence: make something that's more of a batter, at least in round 1.

So I mixed up 1 1/2 lb. of flour, 1/2 oz. yeast dissolved in a little water, 1 1/2 c. tepid water, and 1 1/2 c. room temperature milk (no, I did not scald it first). And by "mixed" I mean "with a spoon" because there was no kneading the resulting very soft dough. Well, batter.

Problem #3: the recipe calls for an initial rise of 6 hours to double in size. Fortunately, I realized that that was EXTREMELY unlikely, and checked back in about 2, by which point my batter was a-bubblin'.

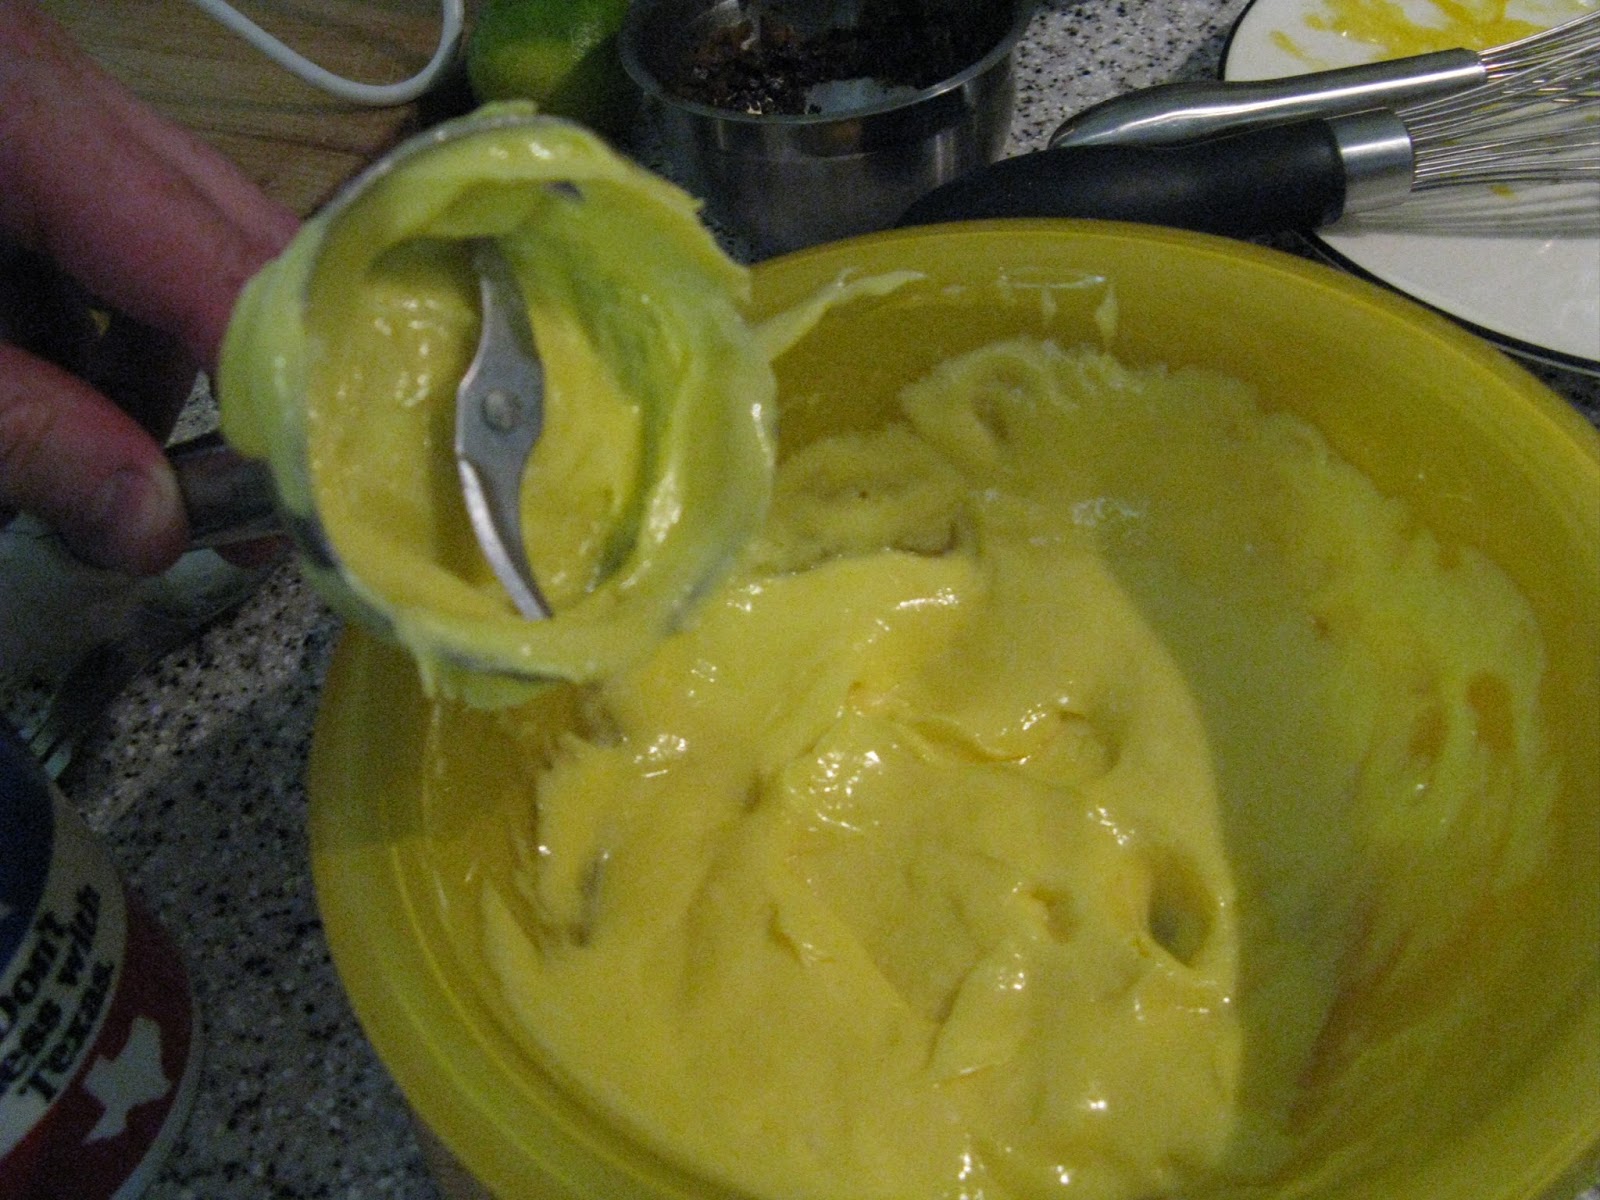
On to beating together the 6 eggs, the cup of sugar, and the pound of butter. I let the Kitchen Aid do the work there, and thank goodness I did, because the butter wasn't quite as softened as I thought - the centers of the sticks were still just this side of frozen. Oops. So then I combined the egg/sugar/butter mixture, my bubbly dough, and the last 1/2 pound of flour and 1/2 oz. of salt.

Problem #4: at this point, I really needed to knead this, and there was just no way - the dough was WAY too soft.
Me: kneadkneadknead

"Chef Spouse, can you add some more flour?"

kneadkneadknead

15 seconds later: "Can you add some more flour?"

kneadkneadknead

40 seconds later: "I need more flour."

kneadkneadknead

23 seconds later: "More flour over here!"

kneadkneadknead

30 seconds later: "NEED. FLOUR."

You get the picture.

We're now switching from weight to volume, because I was eye-balling quantities (there's a scary phrase in baking), but if I had to guess, I'd say I added between 1-2 additional cups of flour.

On to the next (1 hour) rise.


Then it was time to form the cake.

Problem #5: brioche, when formed, really needs something to be formed IN. Like a pan. No such luck here. I had a cookie sheet - I did my best to form a ring on said cookie sheet.

Another 1 hour rise.
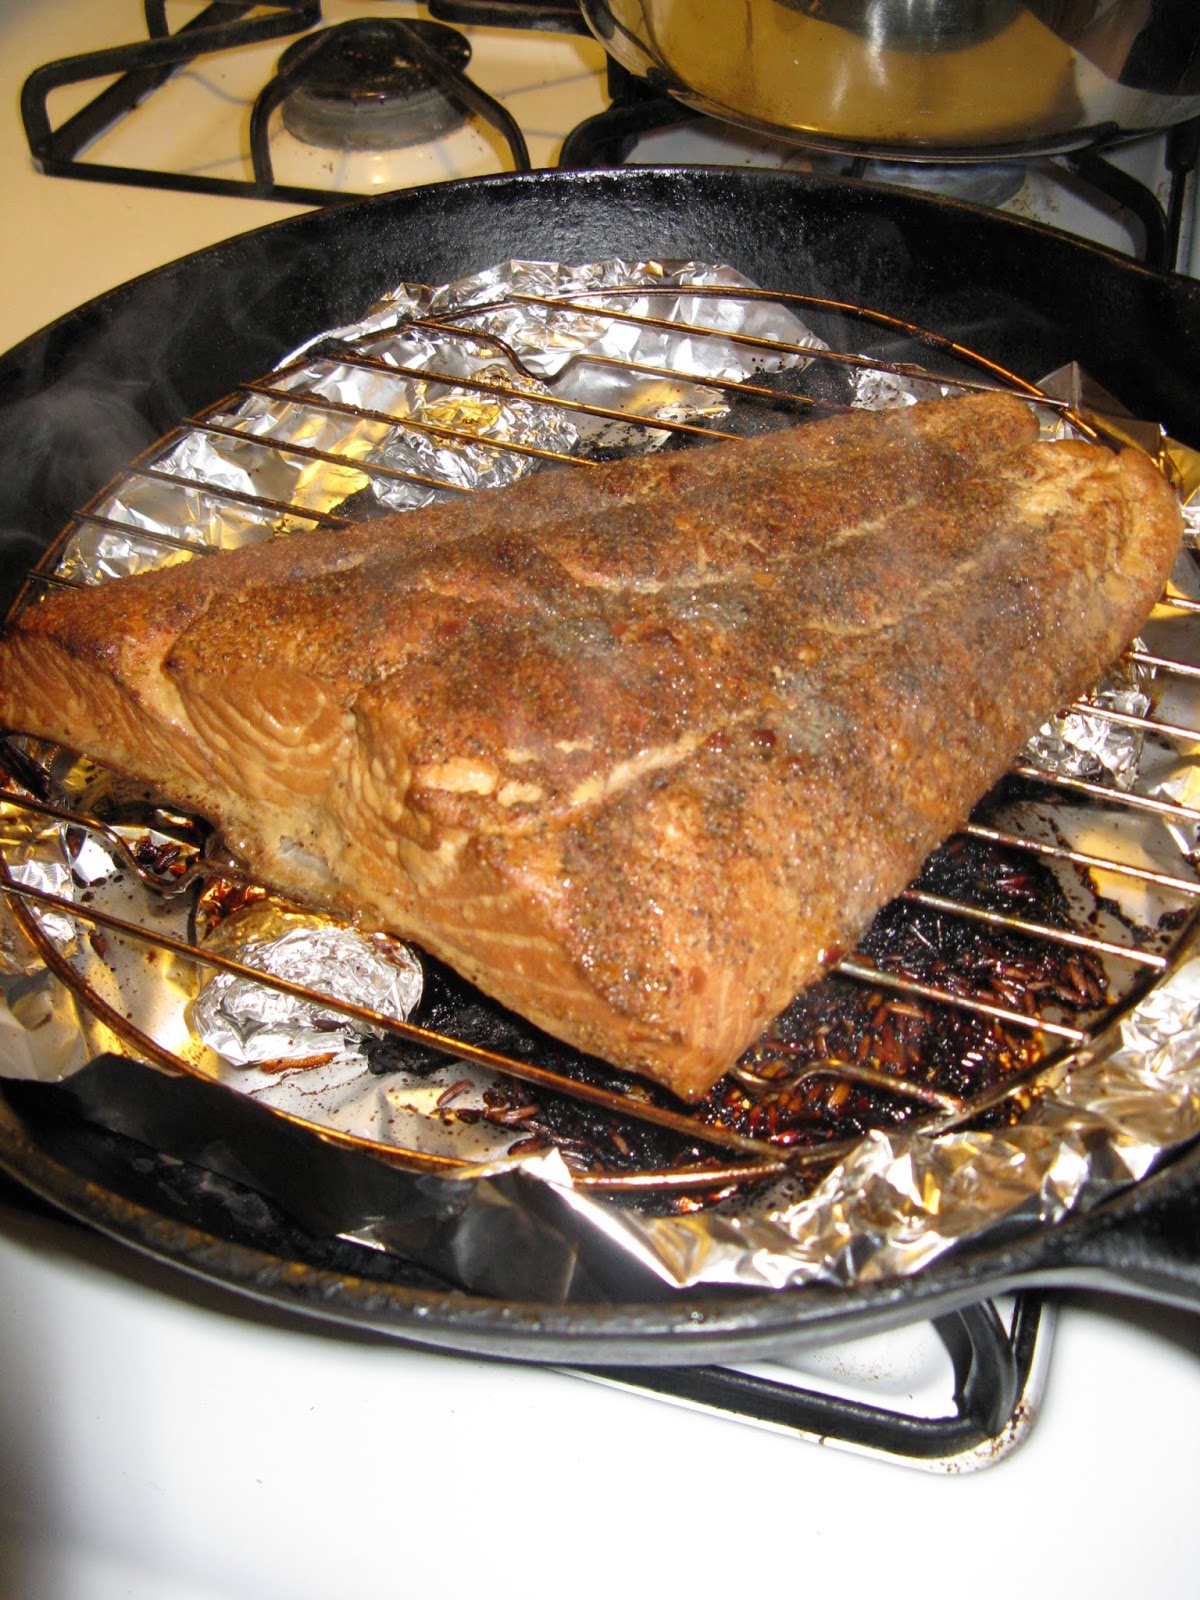
Then bake at 350.

Problem #6: the recipe says to bake a 350 for AN HOUR AND A HALF. Um, no. Spotted that one in time, too, and set the initial bake time for 30 minutes.

Julia says that baguettes need to reach an internal temperature of 200 degrees, and I figured that what's good for the baguette is probably good for the brioche. It reached 200 degrees internally in about 40 minutes.

I also tried something different with the icing that I won't bother to recount, because it was distinctly unsatisfying. It turned out more like a glaze, which tastes fine, but it doesn't hold the colored sugar, thus messing with the whole purple, green, and gold thing. Not kosher.

I thought the last King Cake was Godzilla? I guess that means this was one Mothra, because it was GIANT. Seriously. We ate some Sunday night, I took 2 big pieces into the office Monday, I took 2 more big pieces to friends we had dinner with Monday night, I've been eating it every morning this week for breakfast, and there's still a big hunk left. I probably shouldn't have been surprised - after all, the recipe required 2+ pounds of flour. That gonna big a BIG cake.

So how did it taste?

Divine. Seriously, seriously, seriously amazingly awesome.

Bossman actually asked me today if I had any more. I quote: "I haven't had King Cake in years. You nailed my family recipe. And now I'm craving it."

Conclusion: I have definitely found the right recipe, but the technique needs a little work. You guessed it - this weekend will see ANOTHER King Cake, using the cake recipe from round 2, the icing recipe (minus the lemon) from round 1, and this great idea I have using a springform pan...


10 February 2011

Experiments in King Cake: Take 1

So one thing you need to know about me is that I have a passion for all things New Orleans. The music, the food, the culture - all of it speaks to something deep in my soul. So, although it is not my official New Year's resolution, I set myself the goal of learning how to make a proper King Cake from scratch this year.

If you've been reading this blog at all, you know I'm the baker, and Chef Spouse is the cook (although I definitely cook, too, but he does not bake). So the techniques for yeast doughs are not going to be a problem - it's all a matter of finding the right recipe. Given that many of them are closely guarded krewe secrets, that's easier said than done.

Round one: Restaurant August's John Besh's recipe from Epicurious.com.

One thing you'll notice right away, if you pop over and take a look at the recipe is 3 teaspoons (aka 1 TABLESPOON) of cinnamon.

You may find yourself thinking, as I did: "That is a LOT of cinnamon."

So I cut it back to 2 generous teaspoons.

Honestly, it was still way too much cinnamon.

The problem was compounded by the fact that the icing recipe calls for enough lemon that you actually taste it. The LEMON icing did not go with the CINNAMON cake.

The dough had a really nice texture, though - very easy to handle and it baked up nice and tender.

But it was GIANT. I expected it to be 12-13 inches in diameter.

Not exactly.

It barely fit on my largest circular platter, which was a problem for cooling it, since it was WAY wider than my cooling rack.

It was the Godzilla of King Cakes, assuming Godzilla was made of tasty pastry and not Tokyo-leveling rage.

In other words: I'm still searching for Mr. Right King Cake.

Next up: the delightfully old-skool and vague recipe from the Times-Picayune cookbook, hopefully this weekend.

07 February 2011

Not Dead Yet!

Don't worry - we're not out of commission. Things just got really busy with the end of football season. Next Food Lab goes down in just under two weeks. Subject? Boiled doughs and smoking. Trust me, it will make sense.

Although, as Chef Spouse points out, if we don't do a duck confit lab soon, Mad Kitchen Scientist is probably going to spontaneously combust.